Perform the setting change or removal for indoor unit
The setting change or removal can be performed for indoor unit.
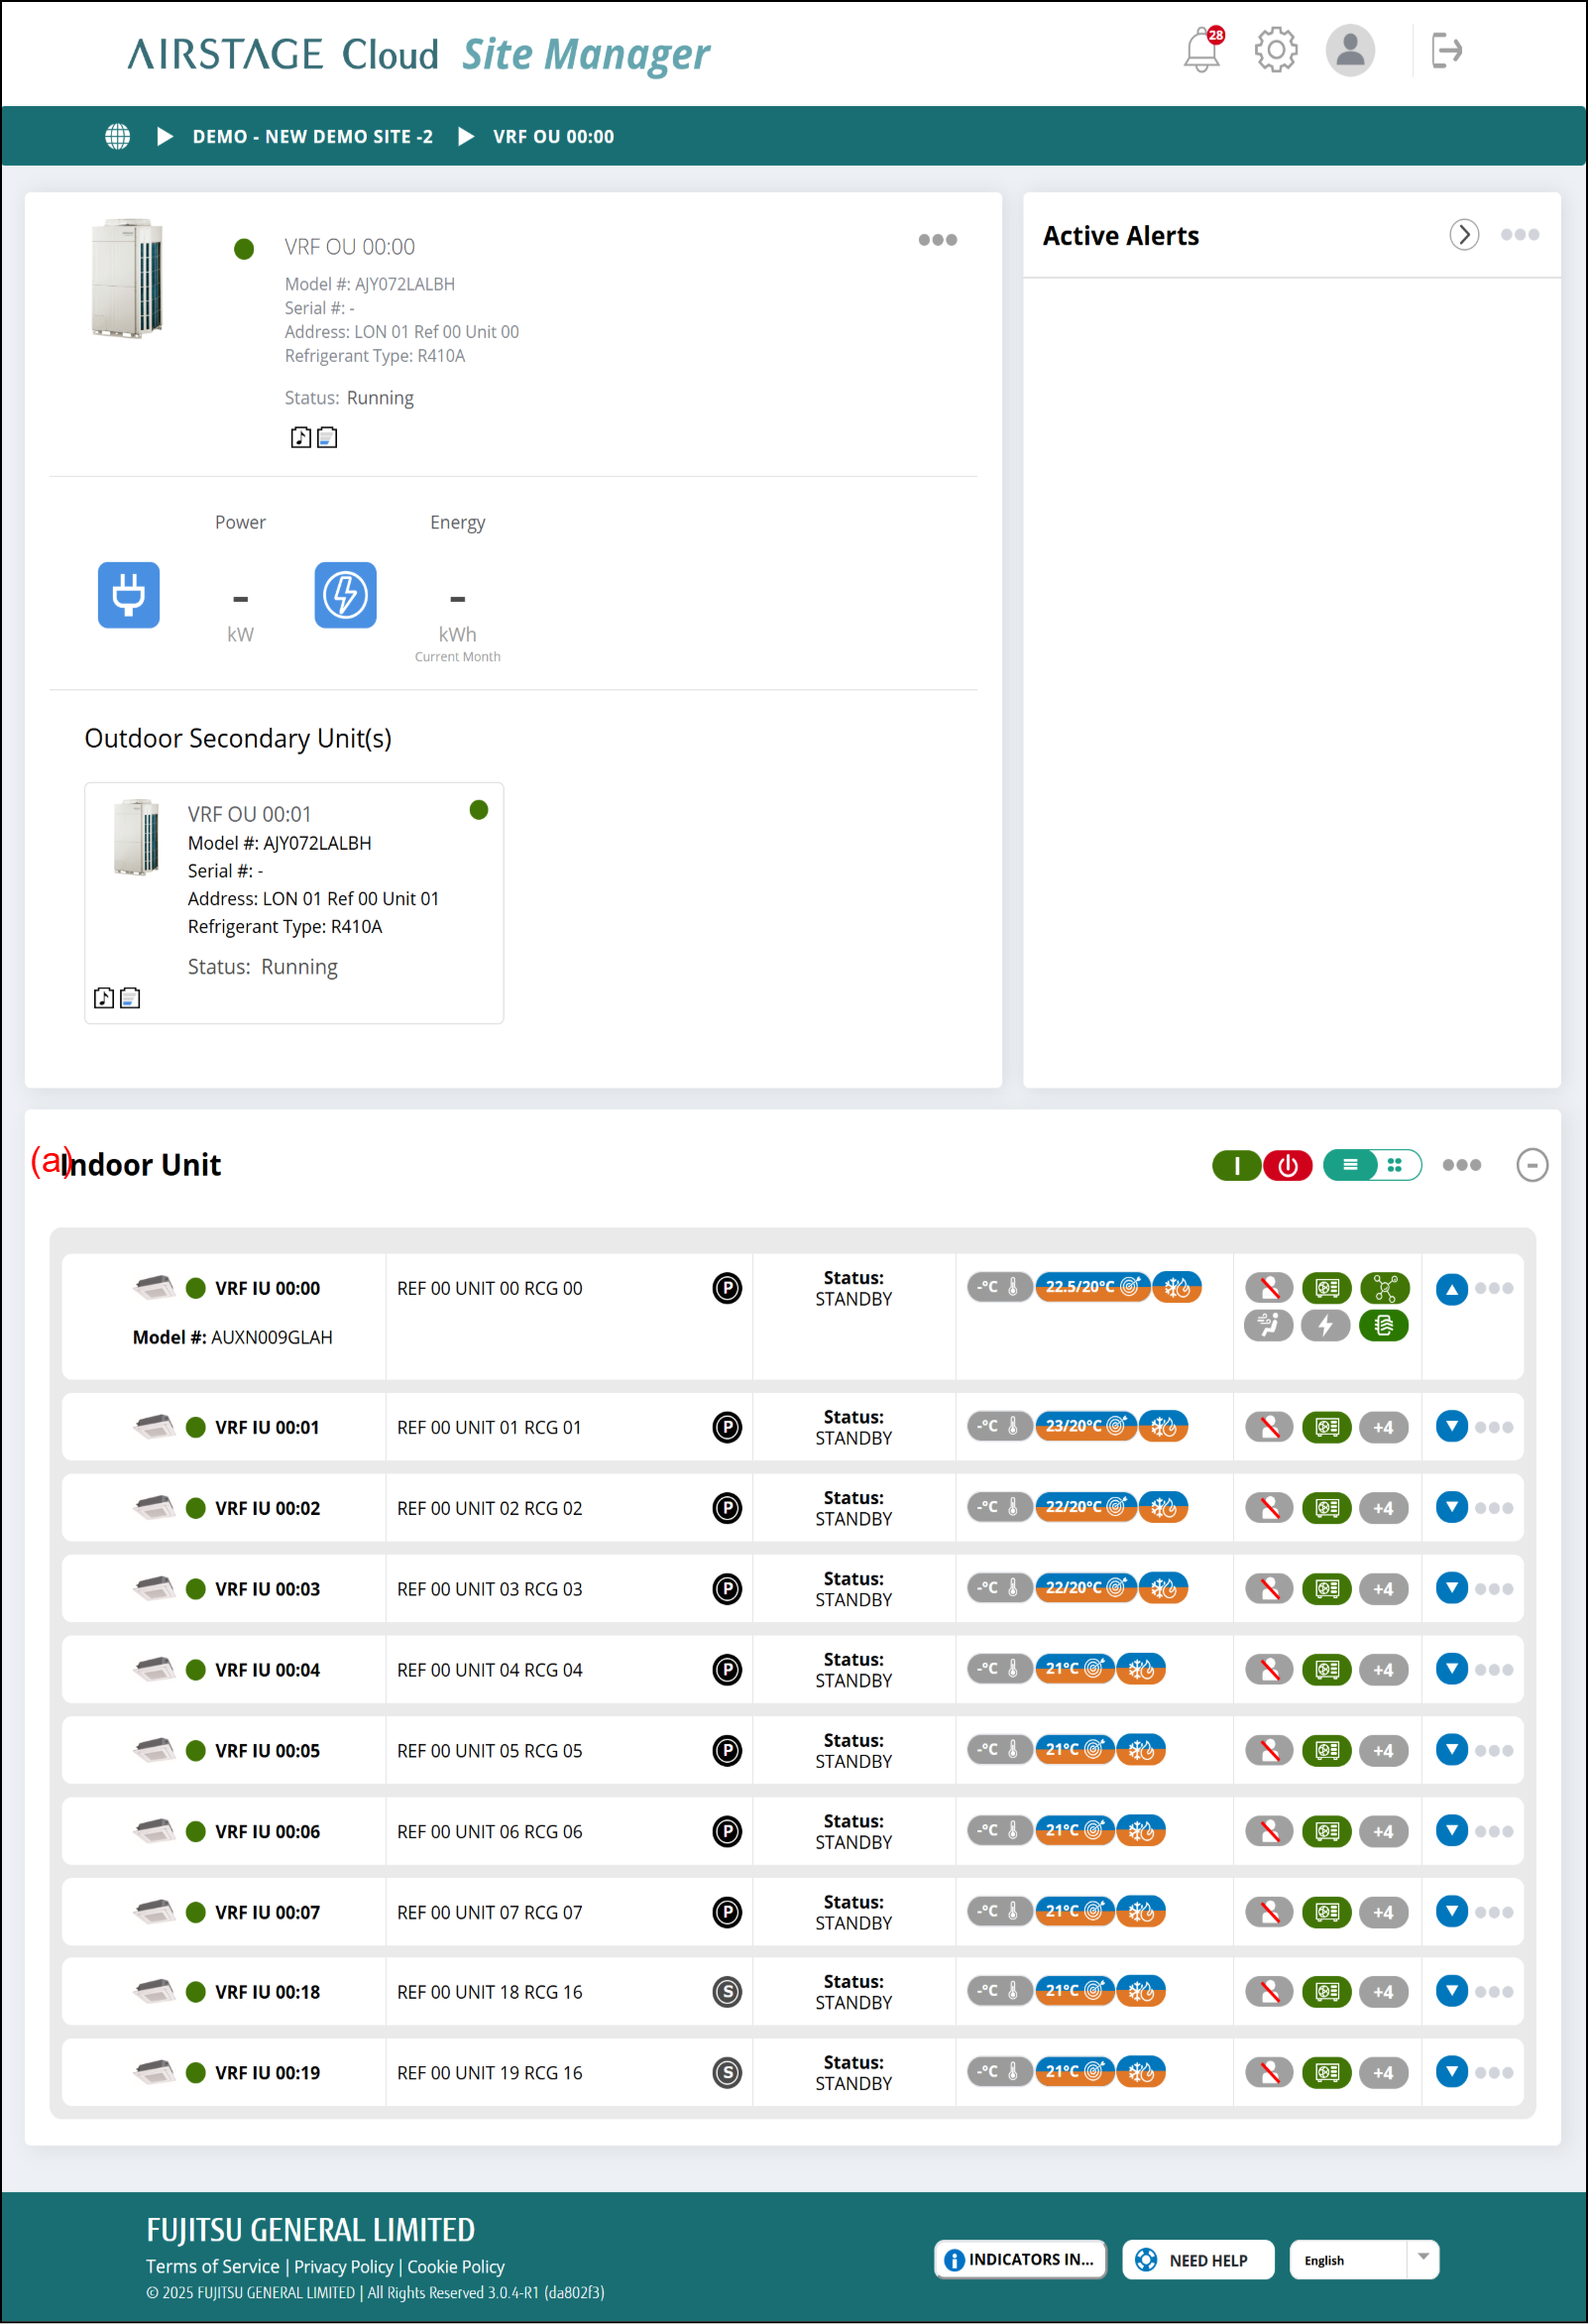
Start-up
- Select link image (a) on “Outdoor Unit Setting” screen.
"Indoor Unit Settings" (General) window
- Select the "General" menu (1).
- Enter the following page information.
To complete the setting, select the button (4).
The setting will be saved, and the window will close.
If you want to close the window without saving the changes, select the button (2).

(a) Enter the indoor unit name.
(b) Model name is displayed.
(c) Enter the serial No.
(d) Refrigerant system address is displayed.
(e) The indoor unit address is displayed.
(f) Operation Stop/Start
(g) Filter Icon
After cleaning the air filters, select this button to reset the filter status.
Check the confirmation message and select [OK]. The filter status is reset.
(h) Set the temperature setpoint.
(i) Select the operating mode.
(j) Economy On/Off
It automatically saves more electricity by changing the set temperature to a moderate setting.
| Cooling/Dry mode | Higher up to 4°C than the set temperature |
| Heating mode | Lower up to 2°C than the set temperature |
The set temperature shown on the screen remains the temperature before moderating.
(k) Anti-Freeze On/Off
(2) [CANCEL] button
(3) [DELETE UNIT] button
Deletes the indoor unit information.
(4) [SAVE] button
Saves the indoor unit information.
"Indoor Unit Settings" (Airflow) window
- Select the "Airflow" menu (1).
- Enter the following page information.
To complete the setting, select the button (4).
The setting will be saved, and the window will close.
If you want to close the window without saving the changes, select the button (2).
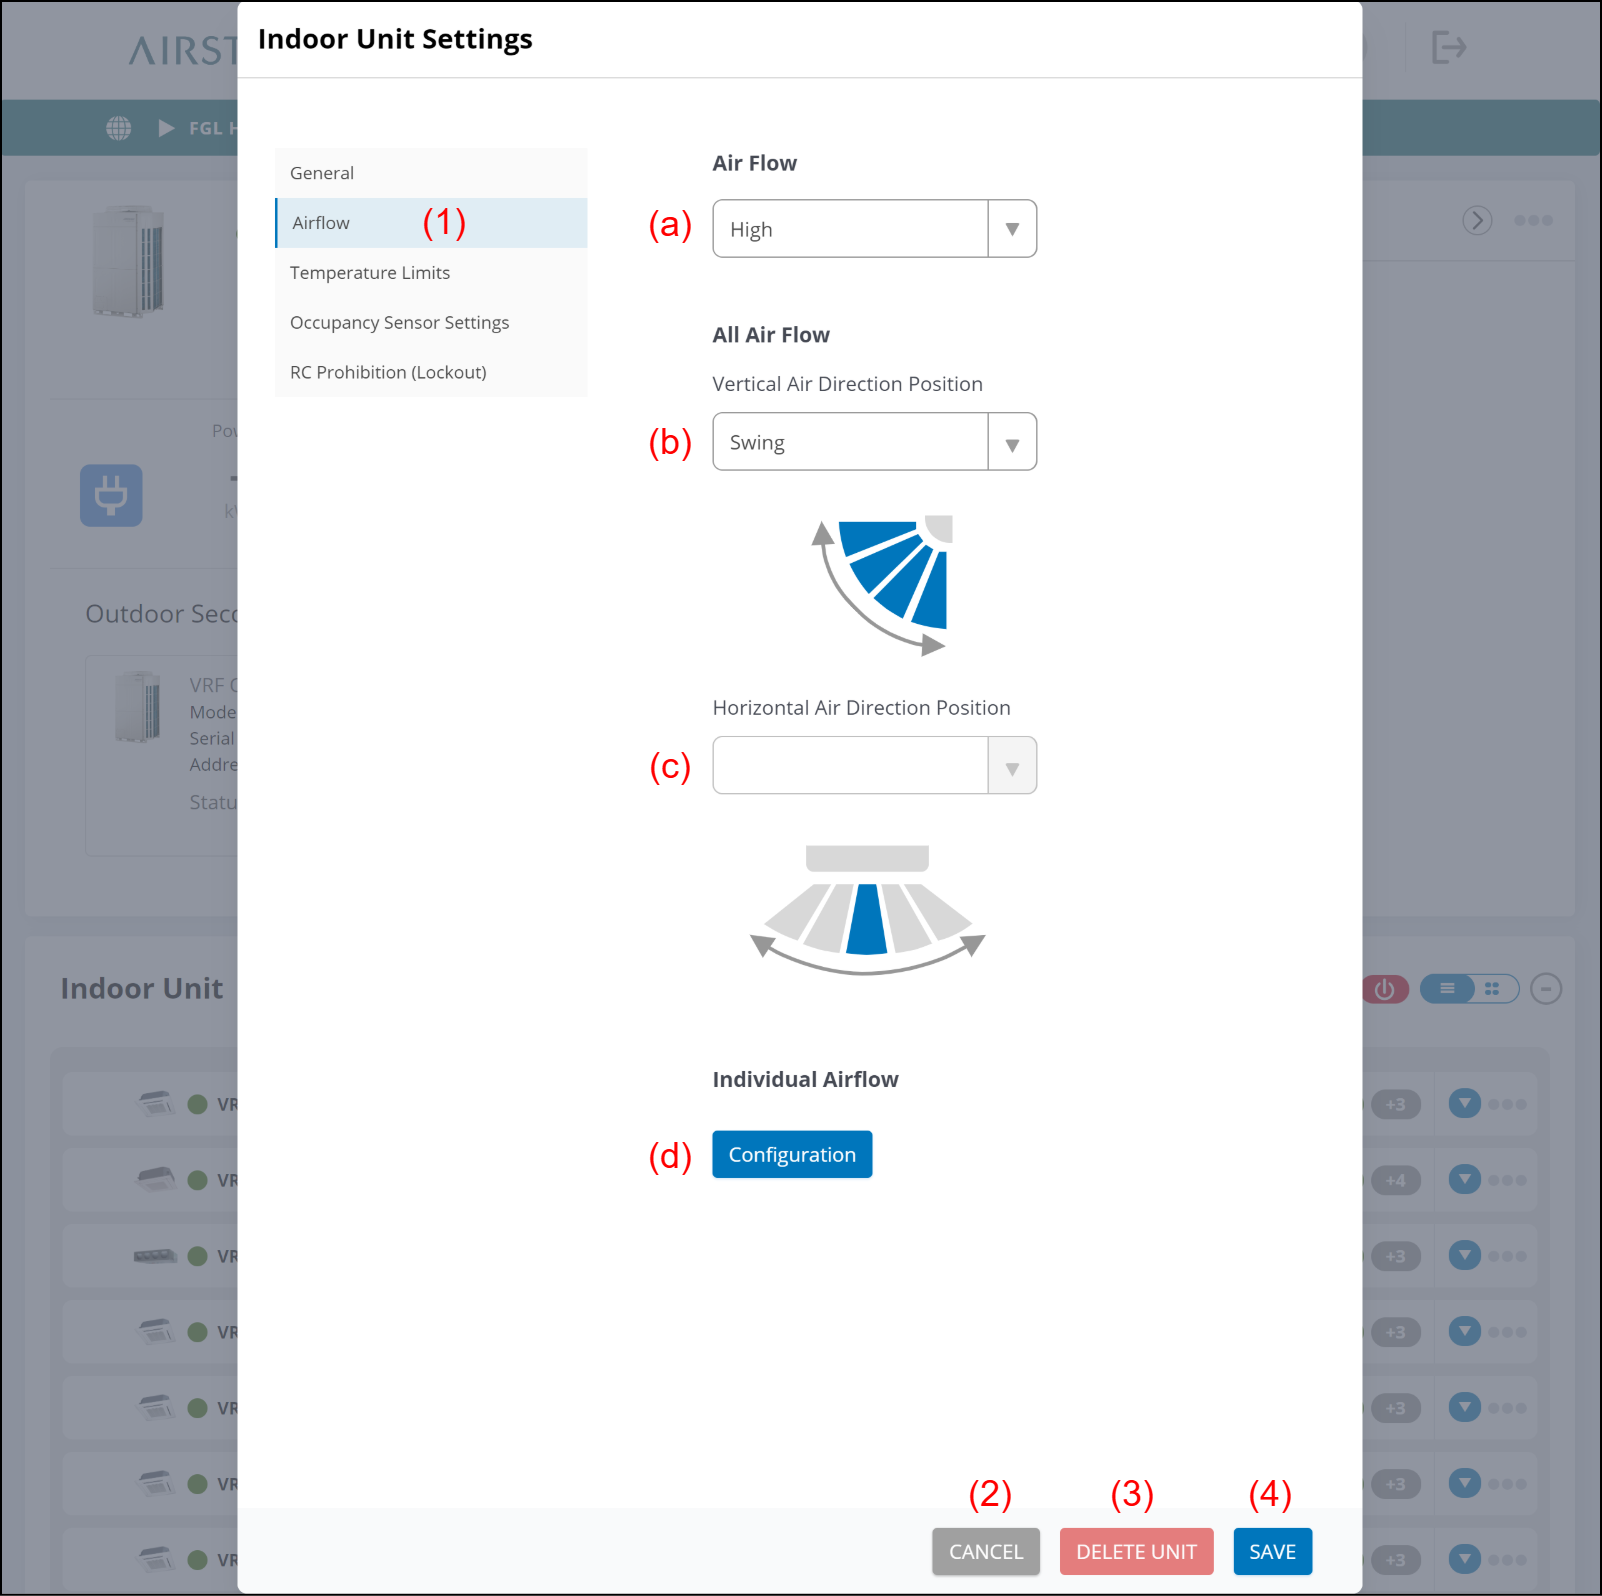
(a) Select the airflow mode.
(b) Select the Vertical louver position.
(c) Select the Horizontal louver position.
(d) [Configuration] button
Moves to the "Individual Airflow - Configuration".
When the individual airflow is set, "Activated" will be shown above this button.
(2) [CANCEL] button
(3) [DELETE UNIT] button
Deletes the indoor unit information.
(4) [SAVE] button
Saves the indoor unit information.
"Individual Airflow - Configuration" window
Set the indoor unit air direction individually.
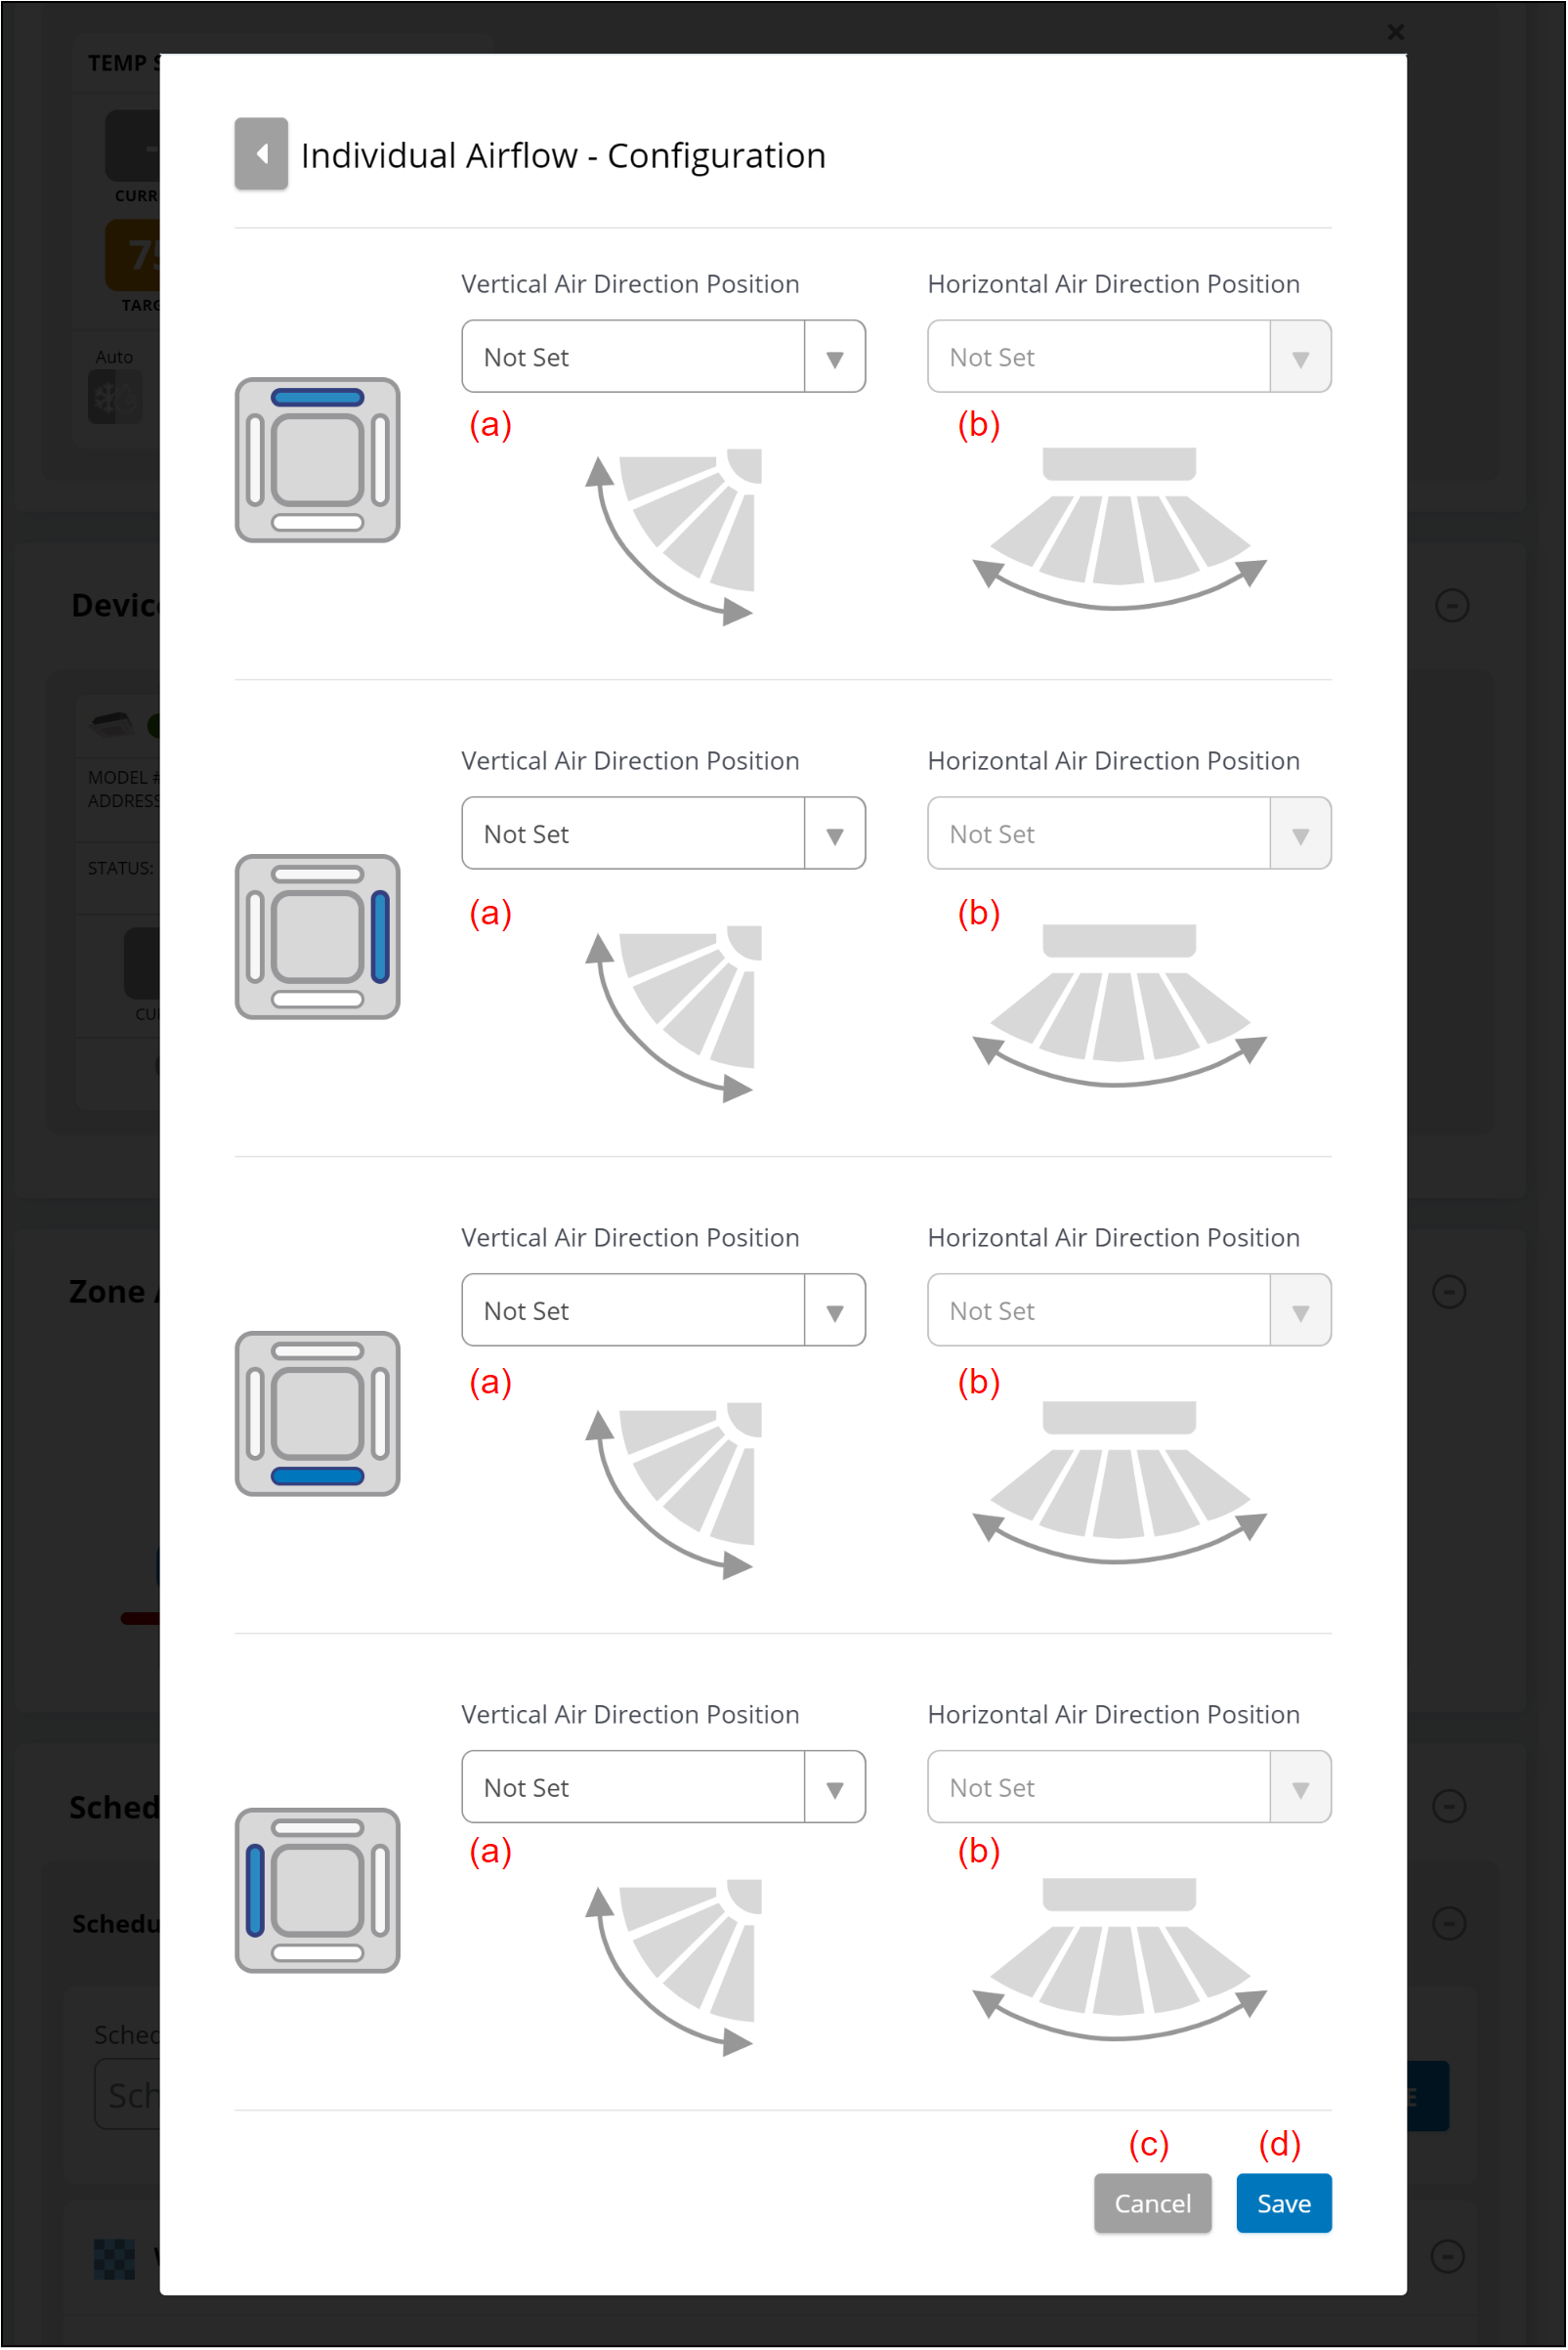
(a) Select the vertical louver position setting.
(b) Select the horizontal louver position setting.
(c) [Cancel] button
(d) [Save] button
Saves the Individual Airflow settings.
"Indoor Unit Settings" (Temperature Limits) window
- Select the "Temperature Limits" menu (1).
- Enter the following page information.
To complete the setting, select the button (4).
The setting will be saved, and the window will close.
If you want to close the window without saving the changes, select the button (2).
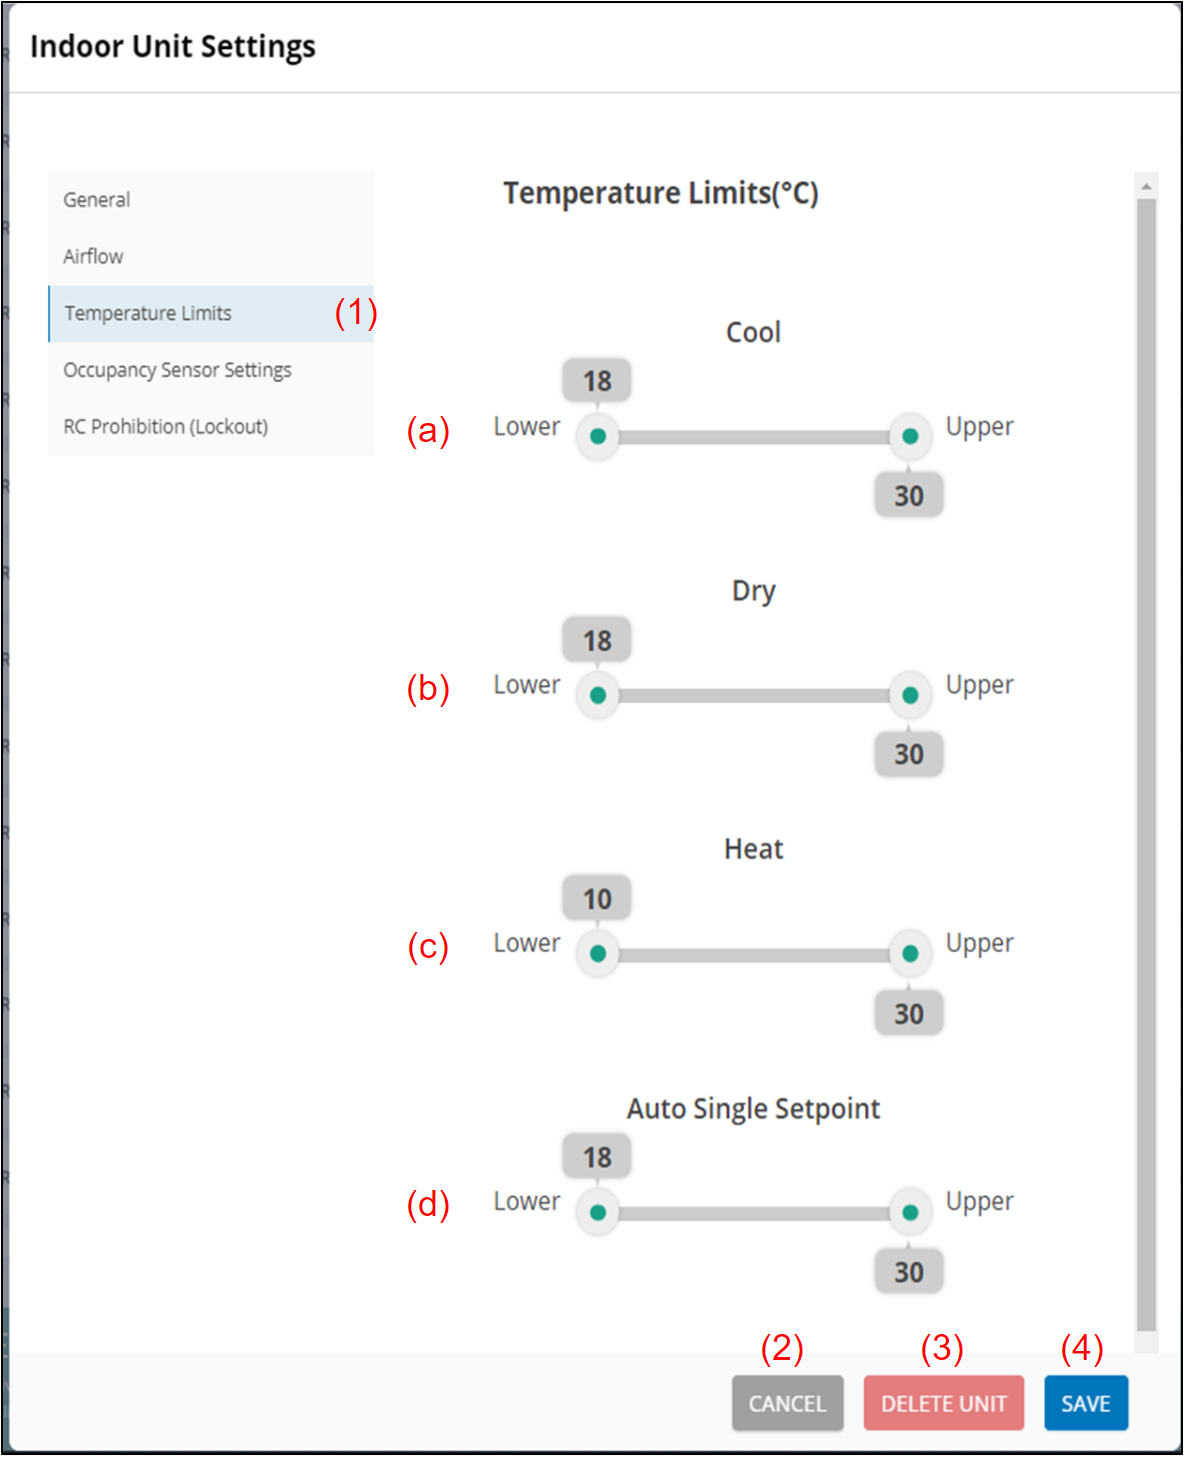
(a) Temperature limits at Cool
(b) Temperature limits at Dry
(c) Temperature limits at Heat
(d) Temperature limits at Auto
Items of Temperature Limits at Auto differ depending on the function information of selected indoor unit. When indoor unit of Dual setpoint is selected, Auto Cool, Auto Heat and Deadband are displayed at Setpoint Limits. When indoor unit of Single setpoint is selected, only Auto single setpoint is displayed at Setpoint Limits.
(2) [CANCEL] button
(3) [DELETE UNIT] button
Deletes the indoor unit information.
(4) [SAVE] button
Saves the indoor unit information.
"Indoor Unit Settings" (Occupancy Sensor Settings) window
- Select the "Temperature Limits" menu (1).
- Enter the following page information.
To complete the setting, select the button (4).
The setting will be saved, and the window will close.
If you want to close the window without saving the changes, select the button (2).
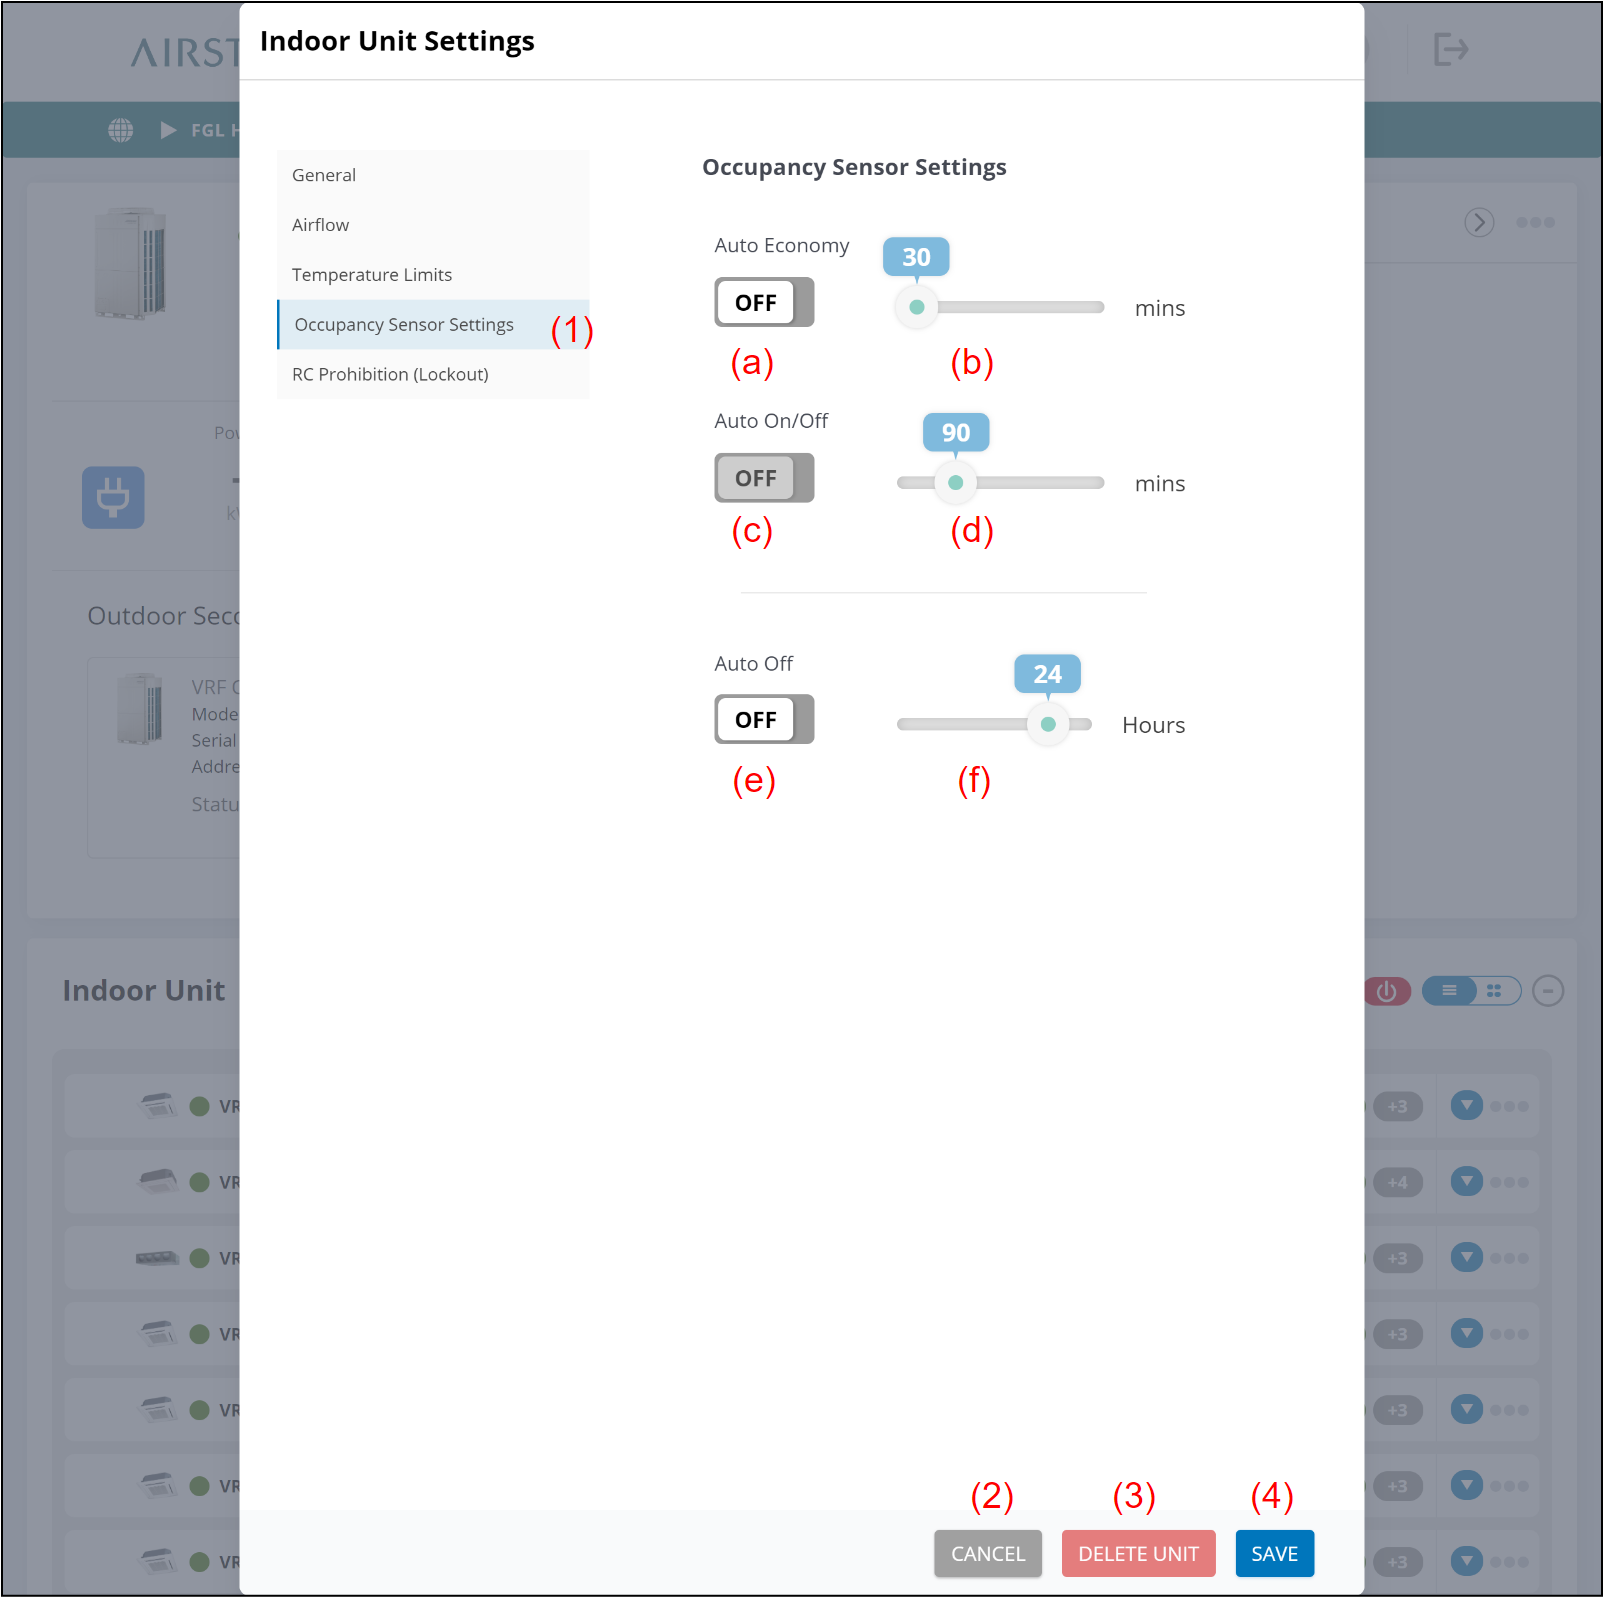
(a) Auto Economy On/Off
(b) Set the time.
(c) Auto On/Off On/Off (supported in the future)
(d) Set the time. (supported in the future)
(e) Auto Off On/Off
(f) Set the time.
(2) [CANCEL] button
(3) [DELETE UNIT] button
Deletes the indoor unit information.
(4) [SAVE] button
Saves the indoor unit information.
"Indoor Unit Settings" (RC Prohibition (Lockout)) window
- Select the "Temperature Limits" menu (1).
- Enter the following page information.
To complete the setting, select the button (4).
The setting will be saved, and the window will close.
If you want to close the window without saving the changes, select the button (2).
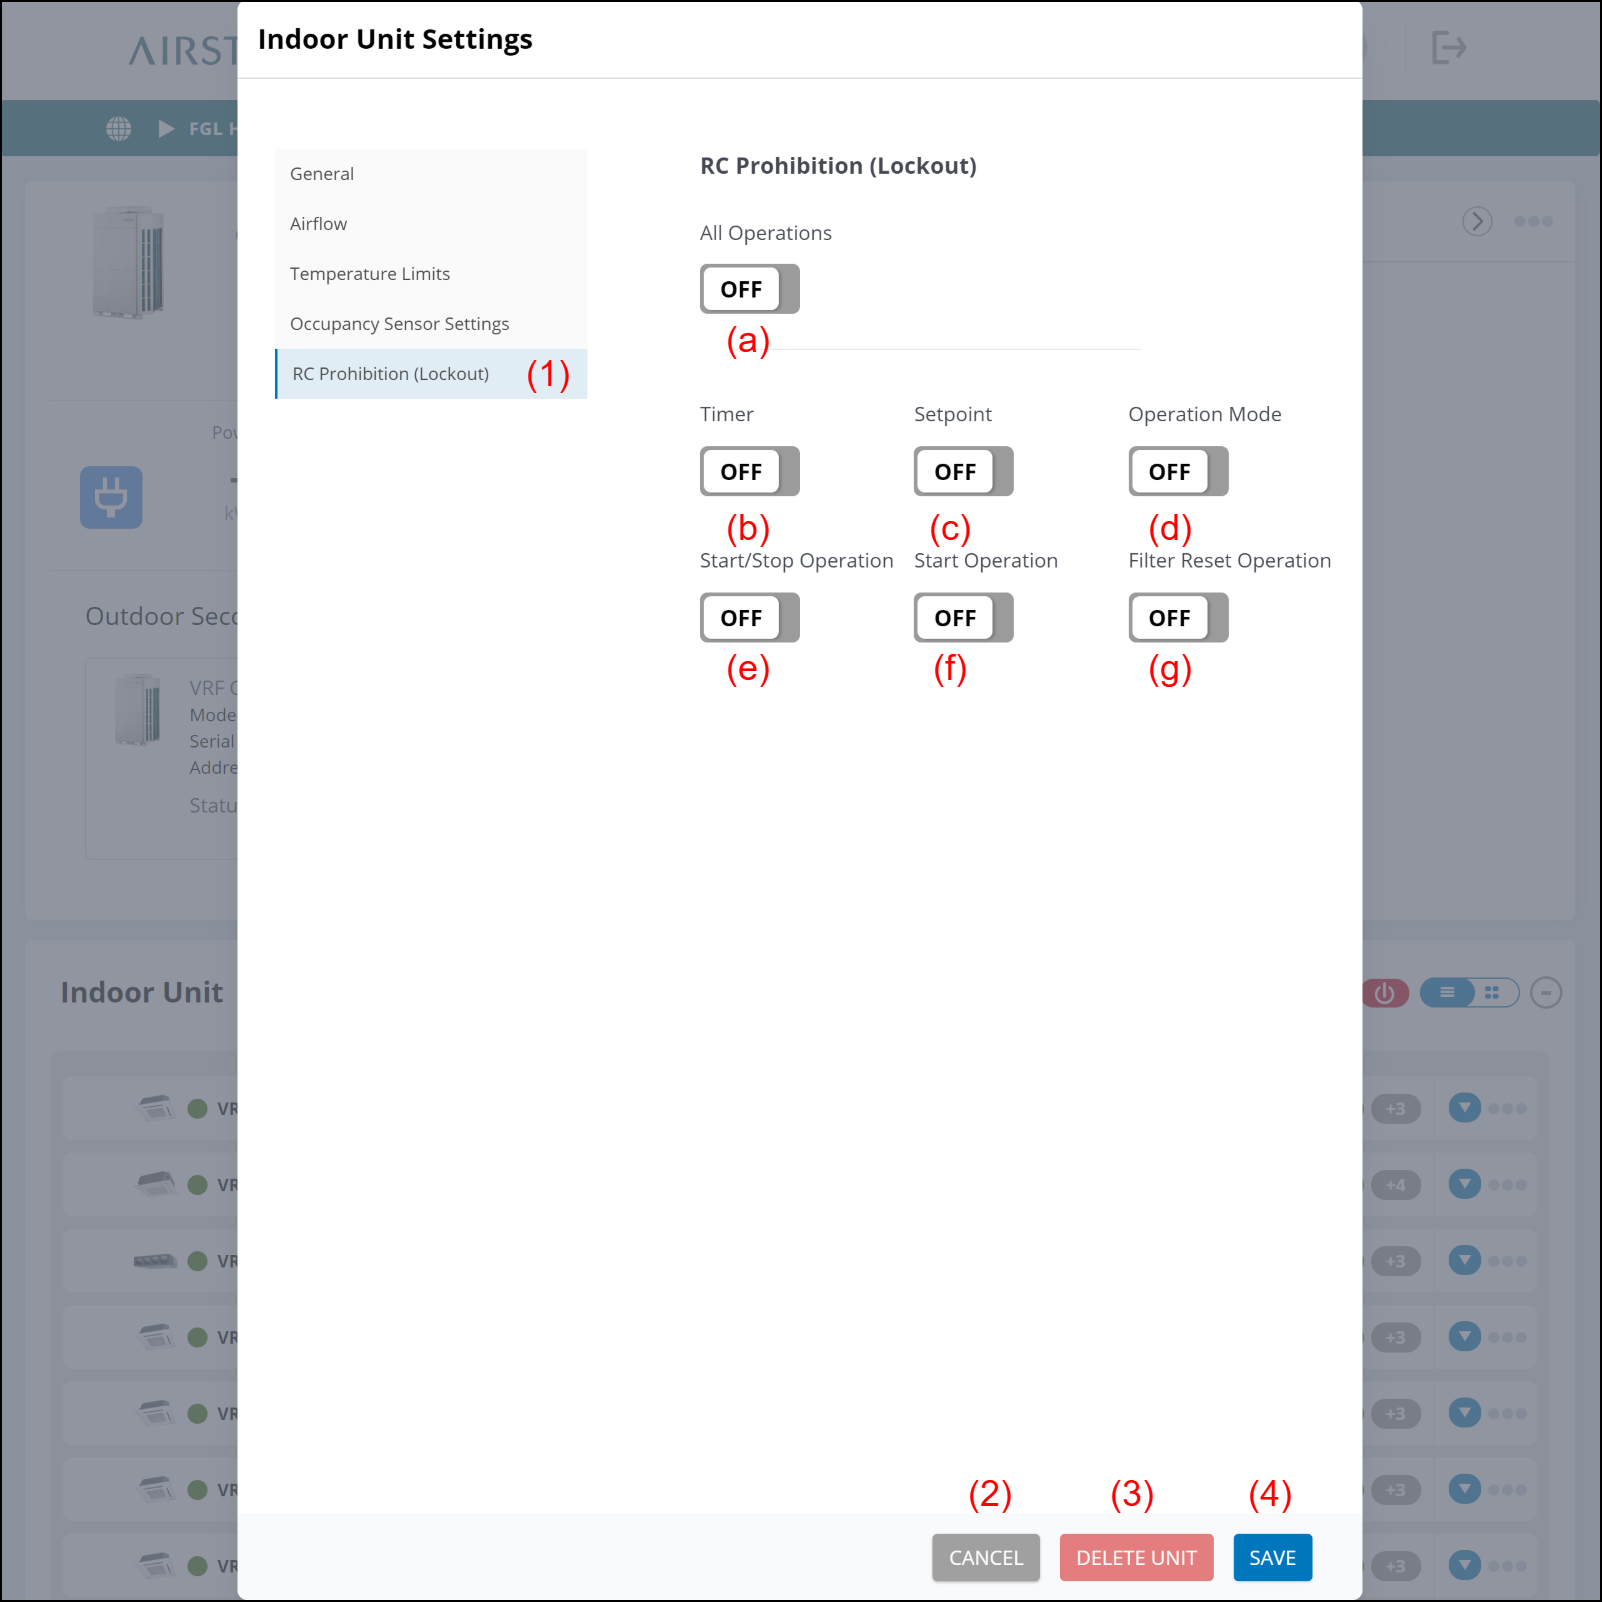
(a) All operations are prohibited.
(b) Timer setting is prohibited.
(c) Setpoint setting is prohibited.
(d) Operation mode setting is prohibited.
(e) Start/Stop Operation is prohibited.
(f) Start Operation is prohibited.
(g) Filter Reset Operation is prohibited.
(2) [CANCEL] button
(3) [DELETE UNIT] button
Deletes the indoor unit information.
(4) [SAVE] button
Saves the indoor unit information.