Connect the WLAN adapter to the access point (pairing)
The procedure differs by the type of WLAN adapter.
For details, refer to the setting manual of the WLAN adapter (www.fujitsu-general.com/global/support/).
|
|
|
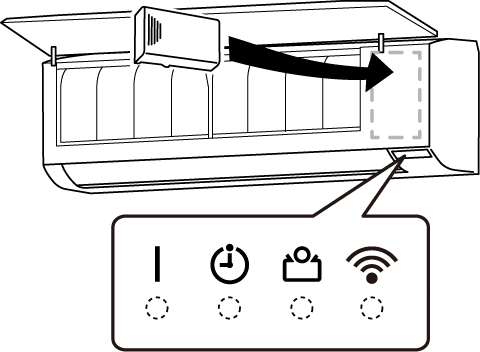
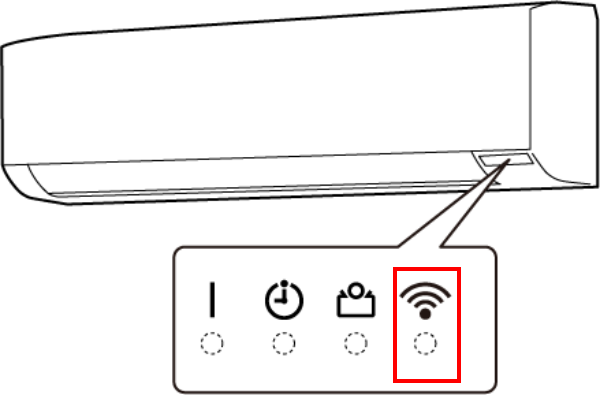
USB-type (The WLAN indicator lamp is on the indoor unit) |
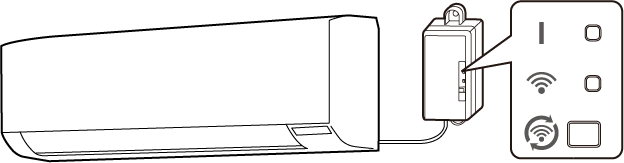
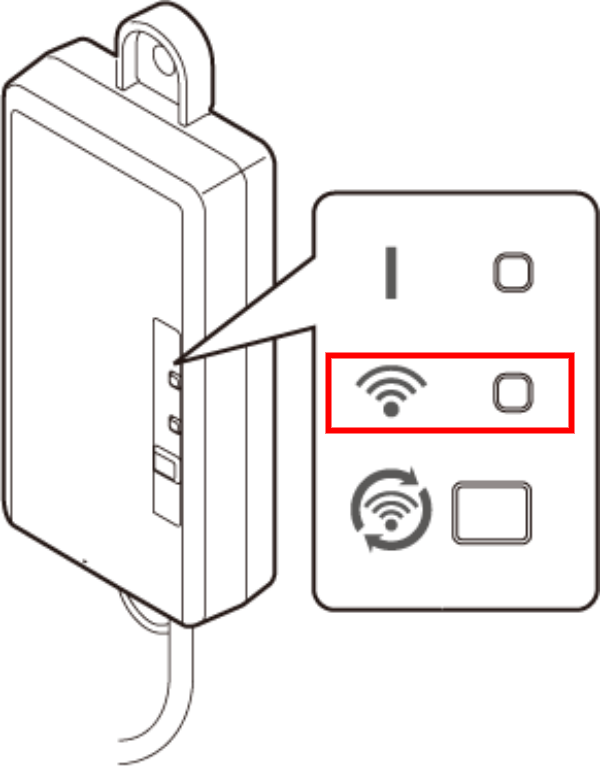
External type (The WLAN indicator lamp is on the WLAN adapter) |
For USB-type WLAN adapter
Select the connection mode; Manual connection or Easy connection.
■ Manual connection
- Set the WLAN adapter to Manual connection mode with the remote controller.
This procedure differs by the remote controller. Refer to the operation manual of the air conditioner or the remote controller.
|
- Open the Wireless LAN Setting screen of your smart device and select the SSID of the WLAN adapter.
-
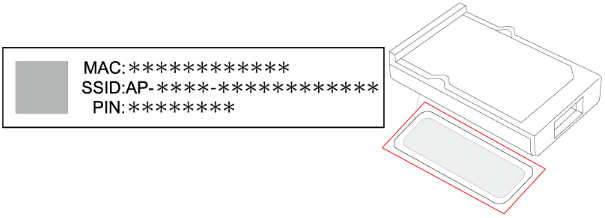
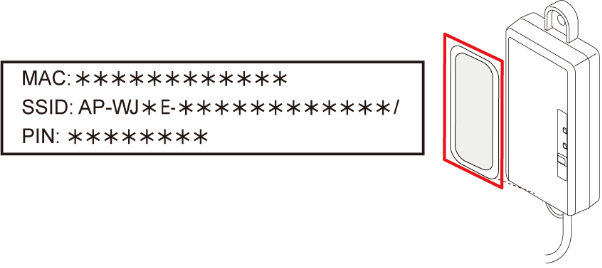
- The SSID is written on the adapter information label (attached to the WLAN adapter).
- In this step, the WLAN adapter is not connected to the Internet. So, a message may appear depending on your smart device.
|
|
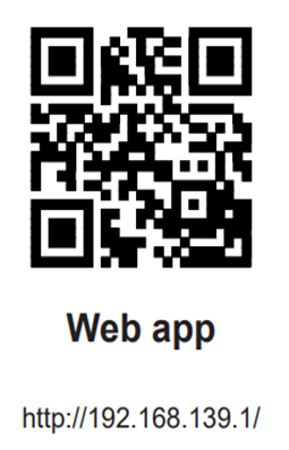
- Scan the following QR code(R) to access http://192.168.139.1/ .
The web app will open on your smart device.
|
|
- Follows the procedure shown on the screen of your smart device.
|
■ Easy connection
- Set the WLAN adapter to Easy connection mode with the remote controller.
This procedure differs by the remote controller. Refer to the operation manual of the air conditioner or the remote controller.
|
- Press the WPS button on the access point. Refer to the operation manual of the access point for the location of the button and how to press it.
The connection will start automatically.
When completing the connection, WLAN indicator lamp (orange) on the indoor unit turns on.
|
|
For external type WLAN adapter
Select the connection mode; Manual connection or Easy connection.
■ Manual connection
- Press and hold the Setting button on the WLAN adapter until the LED 2 (orange) starts slowly blinking (2 seconds on/2 seconds off).
When the LED 2 starts blinking, release your finger from the button. If you press and hold the button for 5 seconds or more, this WLAN adapter enters another setting mode.
|
|
- Open the Wireless LAN Setting screen of your smart device and select the SSID of the WLAN adapter.
-
- The SSID is written on the adapter information label (attached to the WLAN adapter).
- In this step, the WLAN adapter is not connected to the Internet. So, a message may appear depending on your smart device.
|
|
- Scan the following QR code(R) to access http://192.168.139.1/ .
The web app will open on your smart device.
|
|
- Follows the procedure shown on the screen of your smart device.
|
■ Easy connection
- Press and hold the Setting button on the WLAN adapter until the blinking pattern of the LED 2 (orange) changes (2 seconds on/0.5 seconds off).
When the blinking pattern changes, release your finger from the button. If you press and hold the button for 10 seconds or more, the settings of this WLAN adapter are reset.
|
|
Press the WPS button on the access point. Refer to the operation manual of the access point for the location of the button and how to press it.
The connection will start automatically.
The LED 1 (green) and LED 2 (orange) will turn on (stop blinking). |
“QR Code” is a registered trademark of DENSO WAVE INCORPORATED.
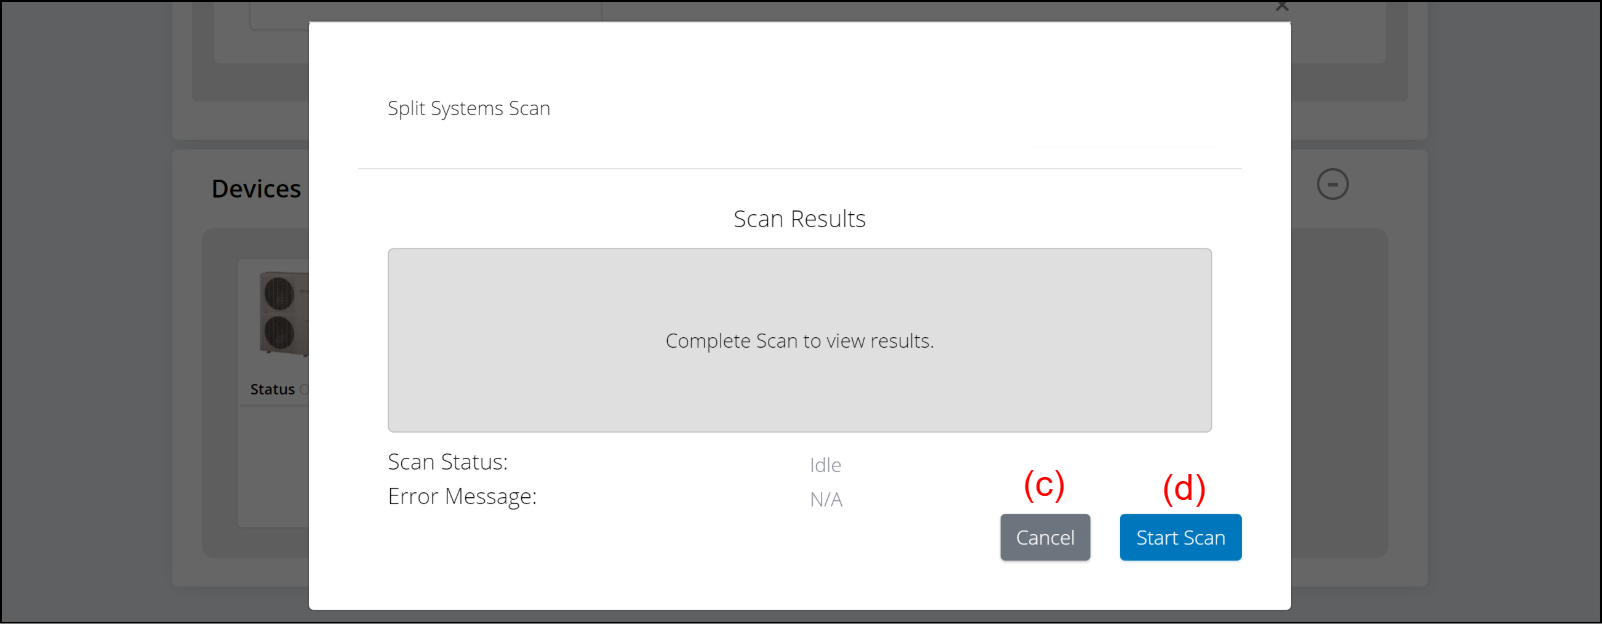
Register the WLAN adapter to the Site Manager
- Select the button (a) of “Devices” on the Site dashboard screen.
The menu items will appear.
- Select “Split Systems Scan” (b).
“Split Systems Scan” window will appear.
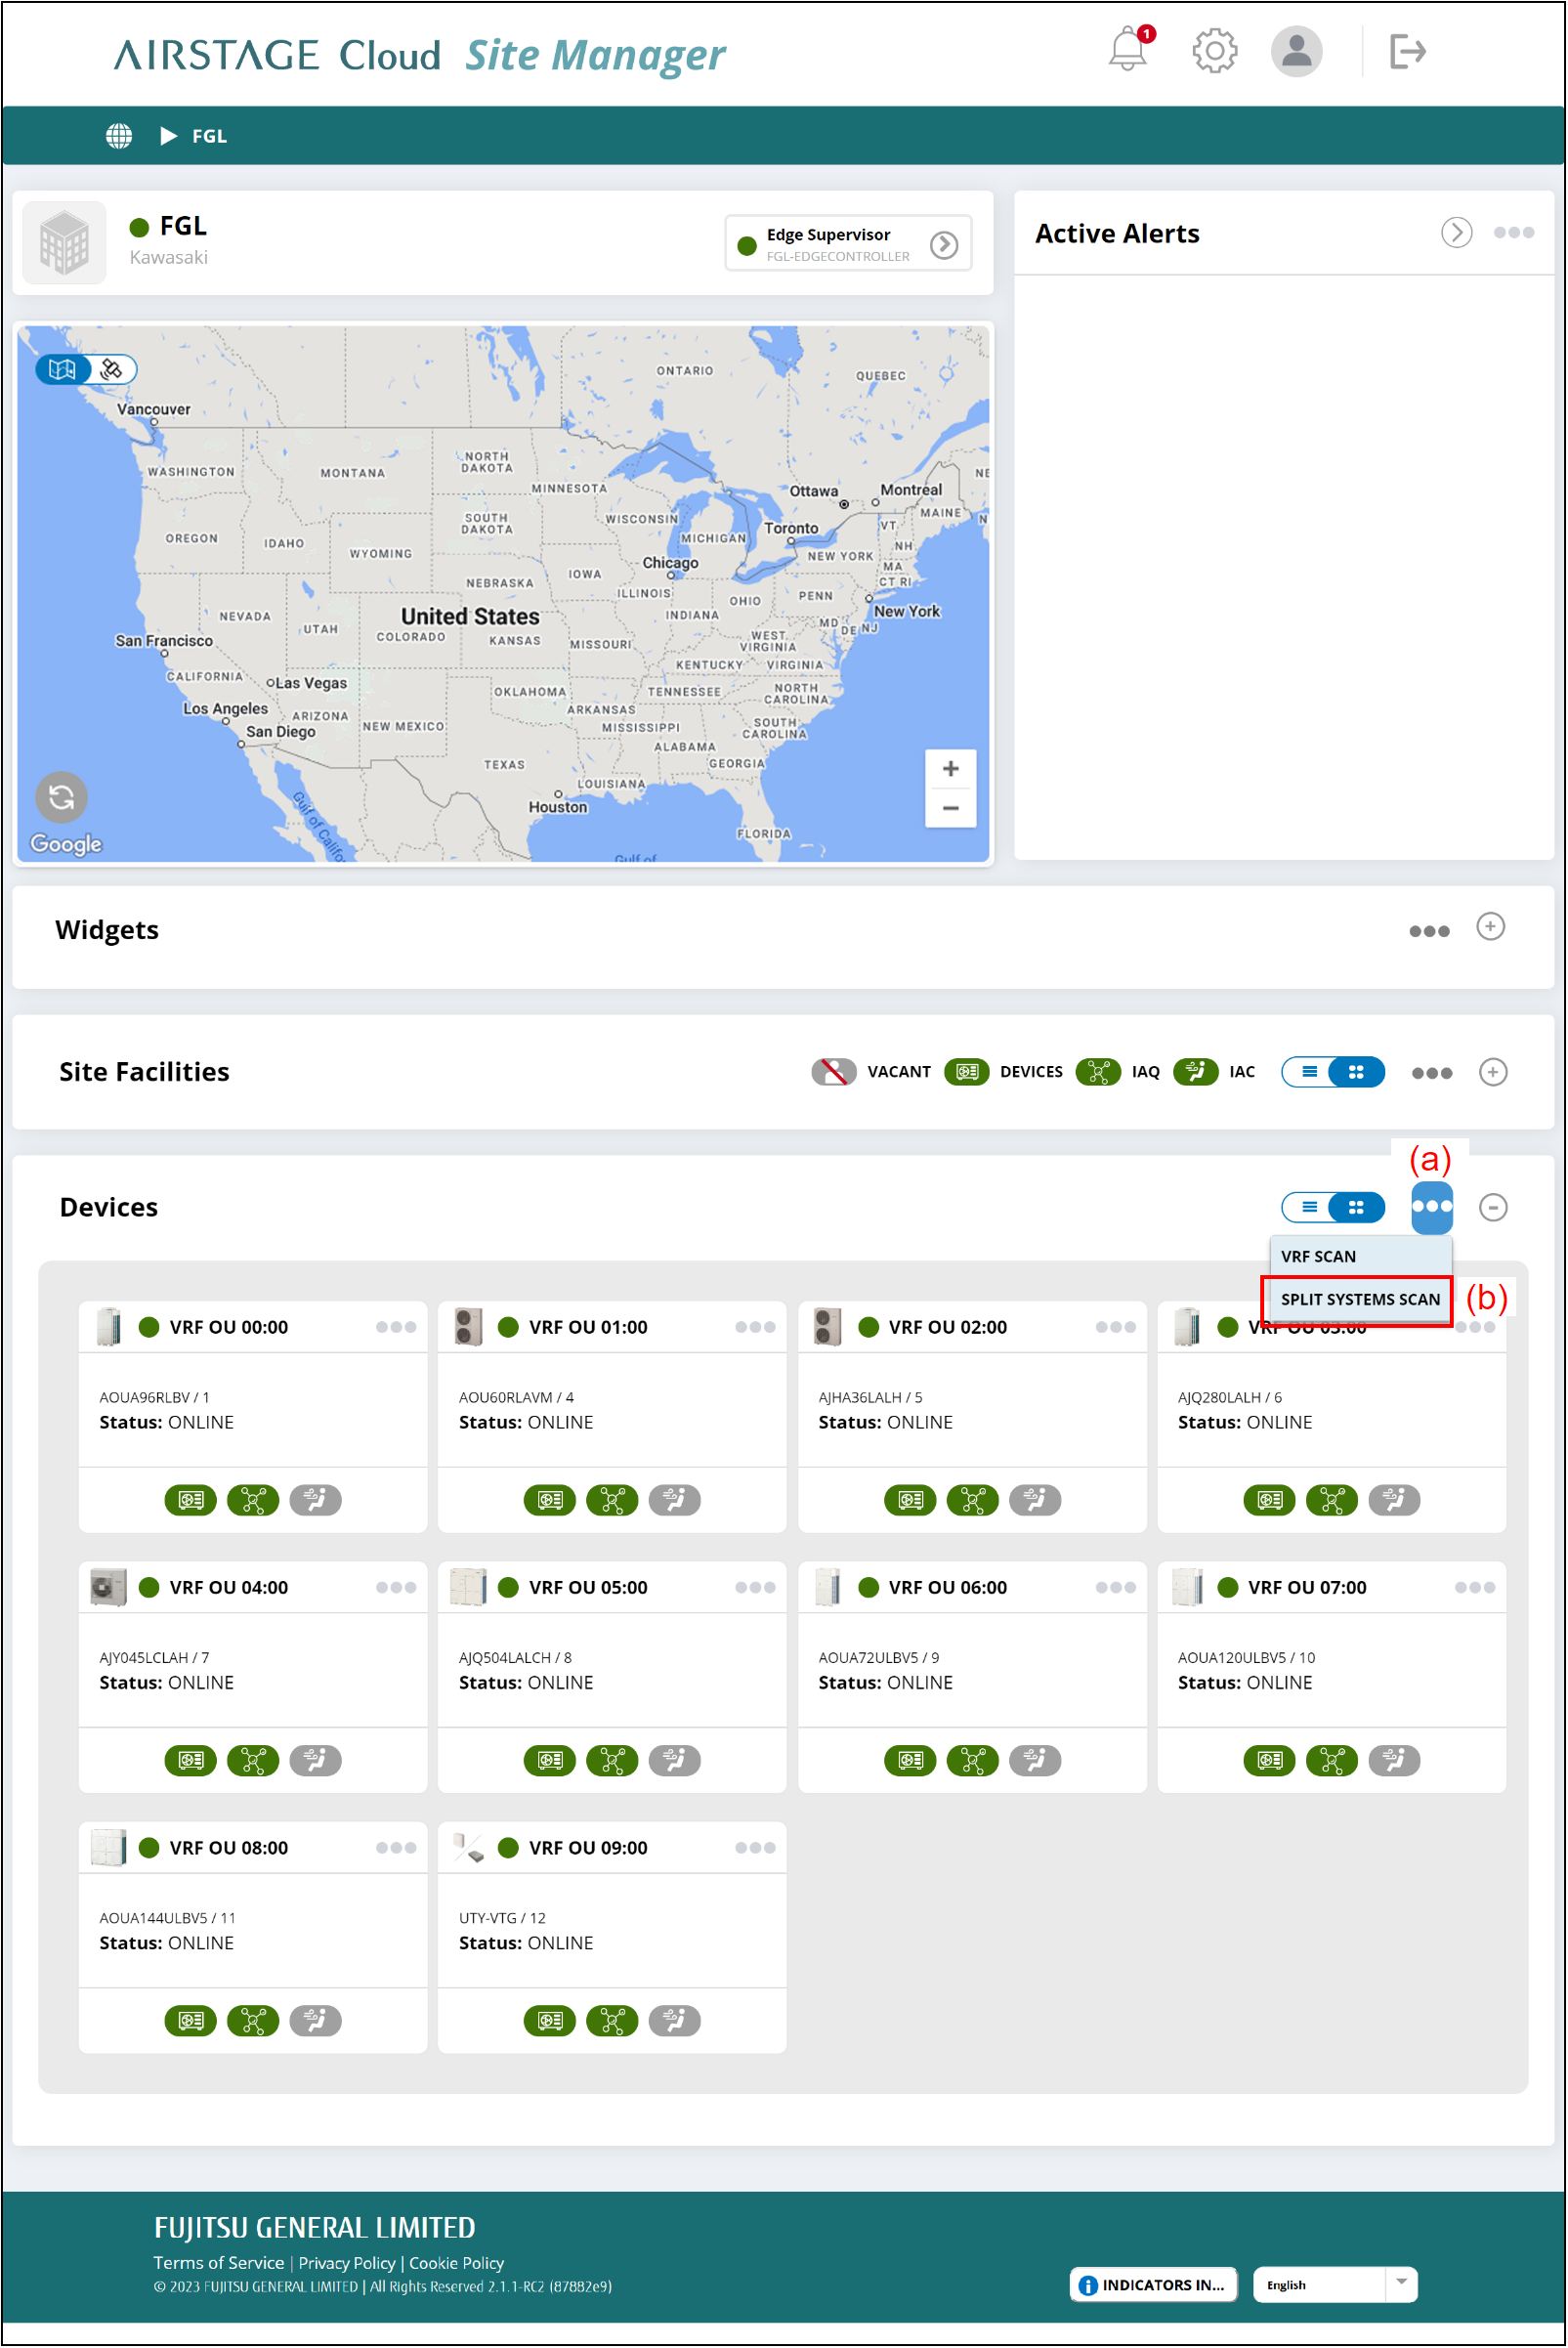
- Select the button (d).
The scan will start and the connected devices will be registered automatically. Regardless of the number of connected devices, it will take about 15 minutes.
During the scan, [Stop Scan] is displayed on the button (d). To stop the scan, select the button (d) again.
If you want to close the window without scanning, select the button (c).
Now the initial setup is complete.