Perform the setting change for indoor unit
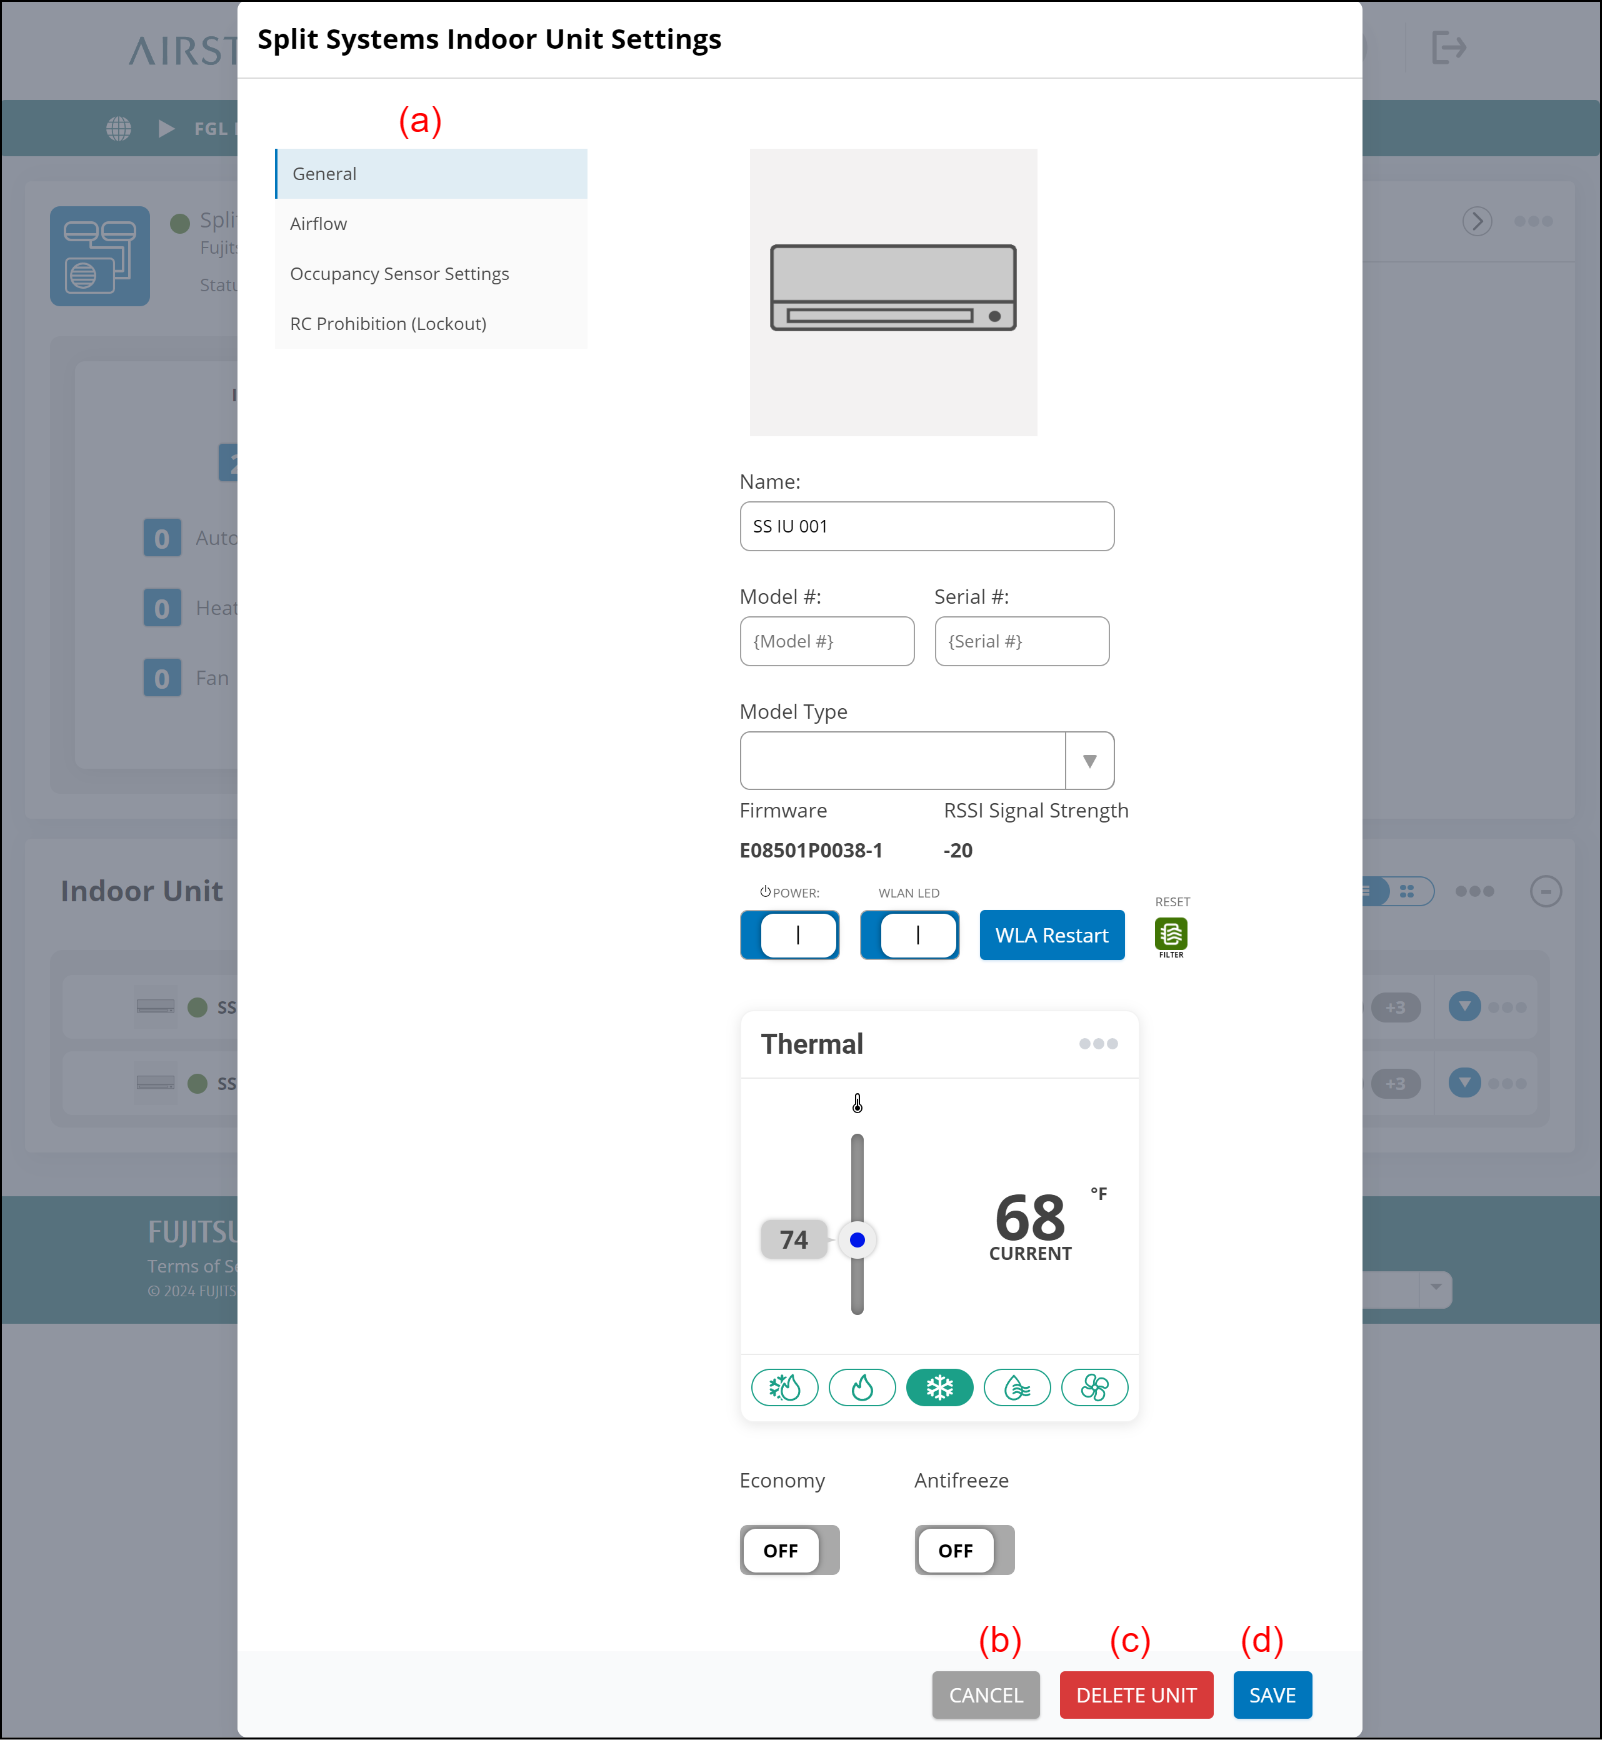
This screen is displayed when you select one of the indoor units on the Split Systems setting screen.
General procedure
- Select the menu (a) to be changed.
- Enter the information or settings to be changed.
Refer to the following descriptions for details on each setting item. - To complete the setting, select the [SAVE] button (d).
The setting will be saved, and the window will close.
If you want to close the window without saving the changes, select the [CANCEL] button (b).
(c) [DELETE UNIT] button
Deletes the indoor unit information.
Details on each setting item
General
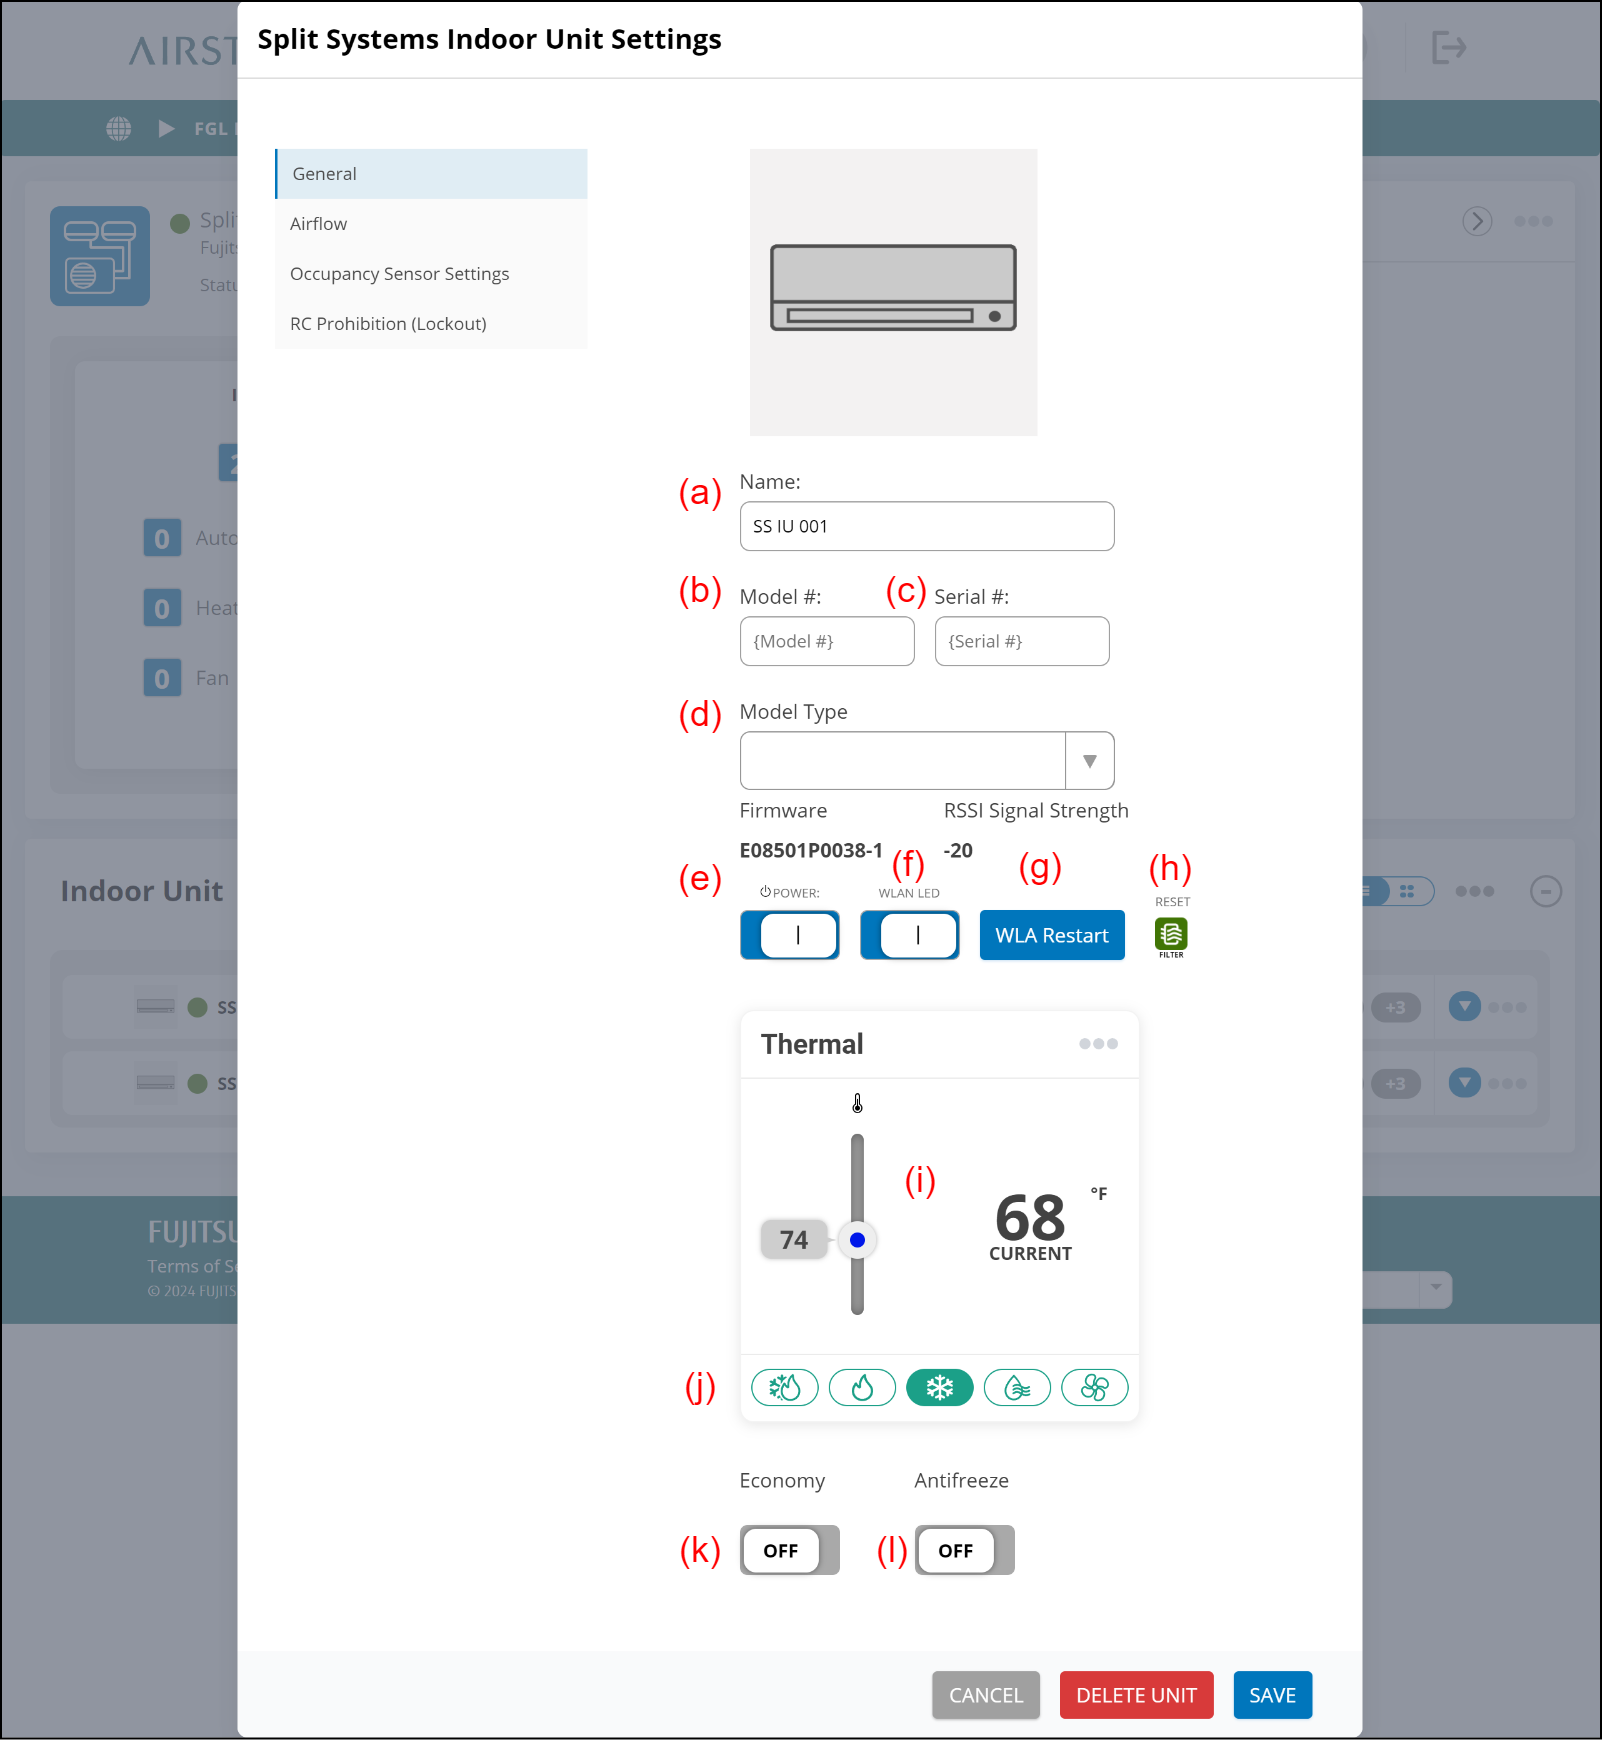
(a) Enter the indoor unit name.
(b) Enter the model name.
(c) Enter the serial number.
(d) Select the type of indoor unit.
(e) [Stop/Start] button
To stop/start the indoor unit operation, select this button.
(f) [WLAN LED] button
To turn on/off the WLAN indicator lamp on the indoor unit or WLAN adapter, select this button.
(g) [WLAN Restart] button
To restart the WLAN adapter connected to the indoor unit, select this button.
Check the confirmation message and select [OK]. The WLAN adapter restarts immediately.
It takes about 1 minute to complete restarting.
(h) Filter Icon
After cleaning the air filters, select this button to reset the filter status.
Check the confirmation message and select [OK]. The filter status is reset.
(i) Set the temperature setpoint.
(j) Set the operation mode.
(k) [Economy] button
To start/stop the Economy operation, select this button.
(l) [Anti-Freeze] button
To activate/deactivate the Anti-Freeze function, select this button.
Airflow
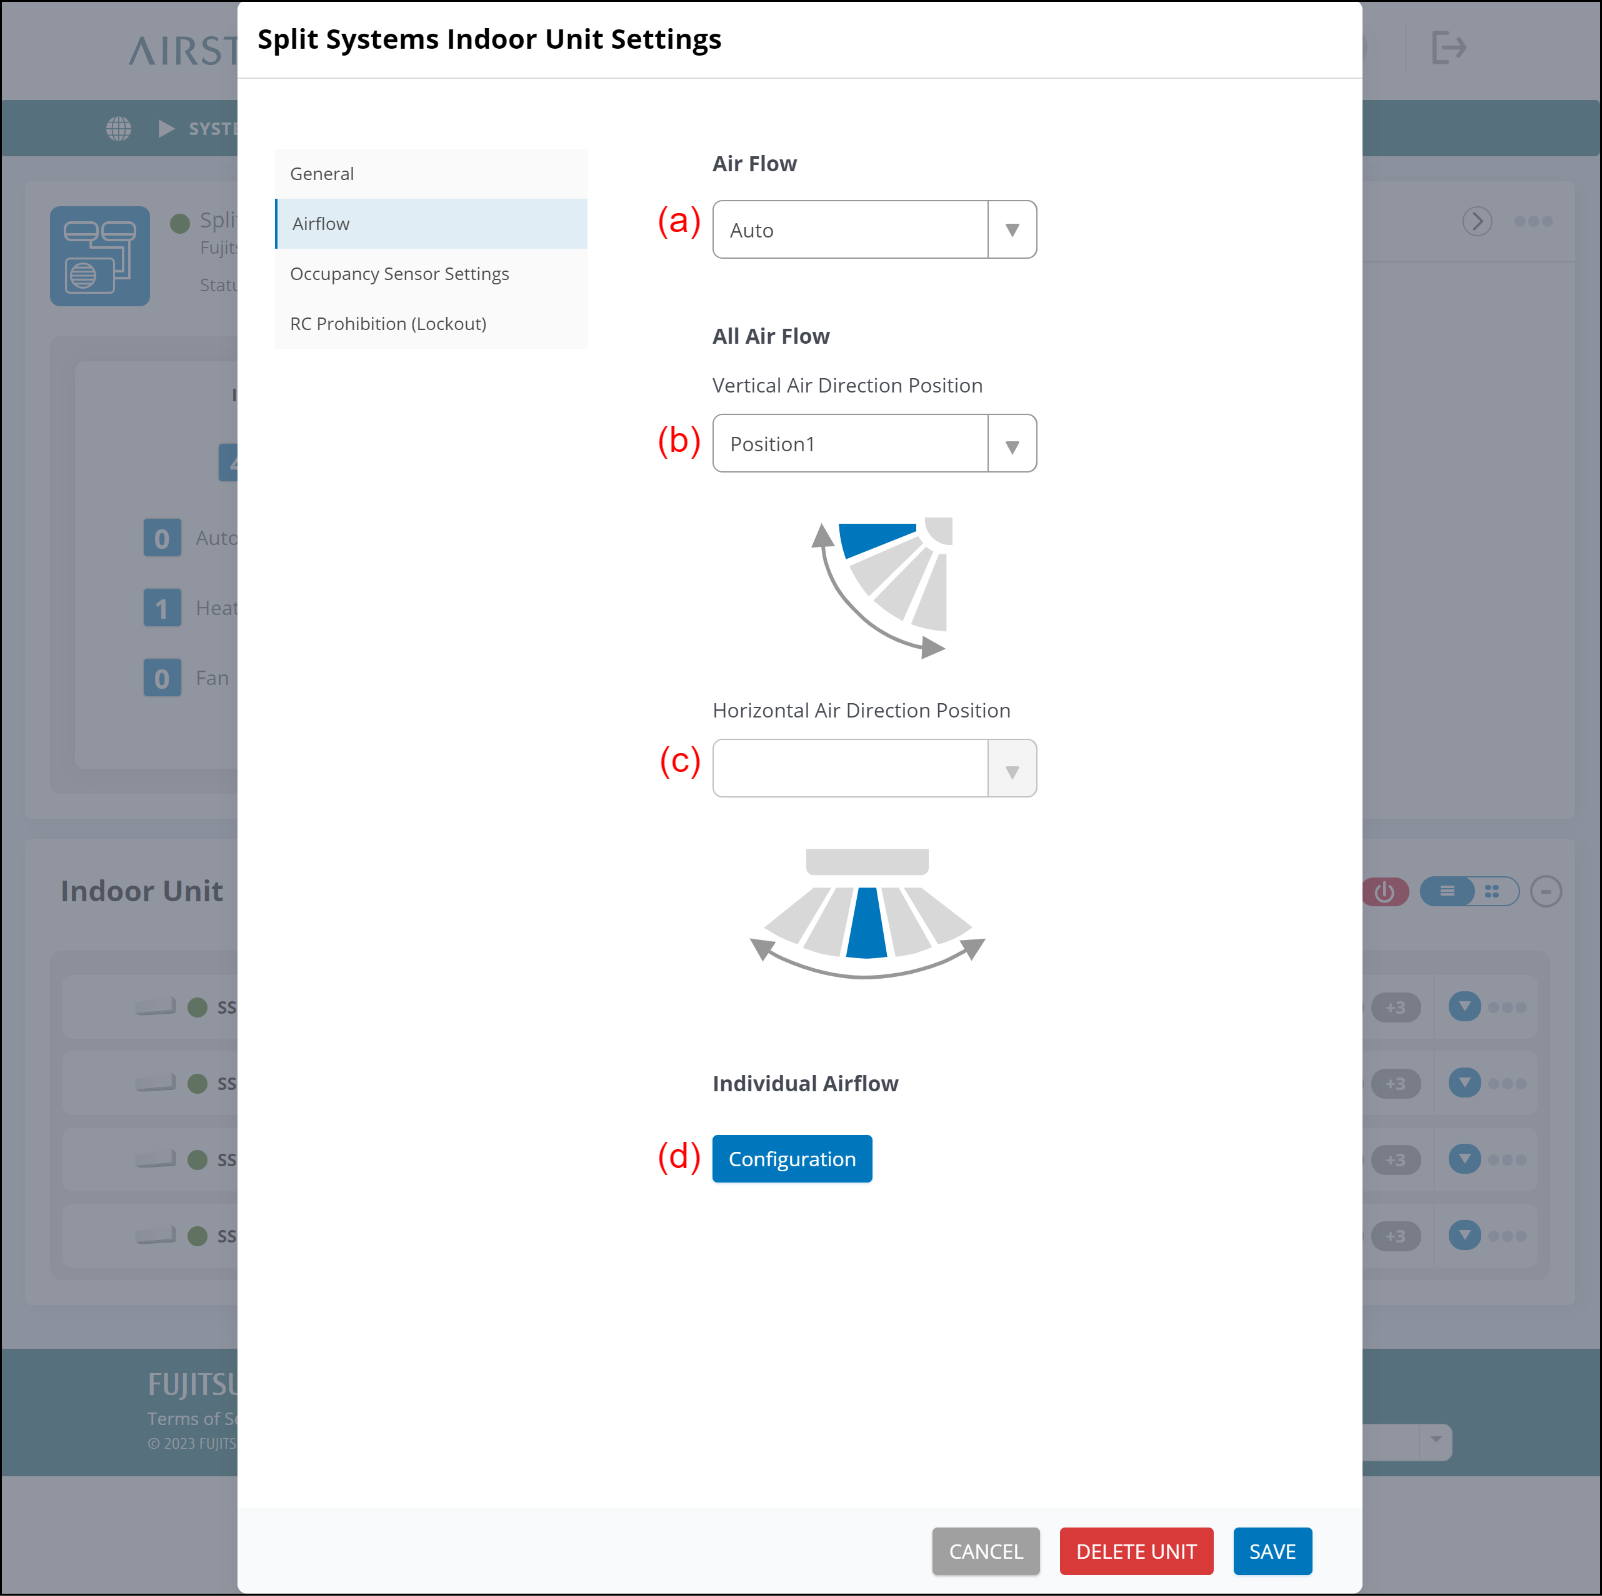
(a) Select the fan speed.
(b) Select the up/down airflow direction.
(c) Select the left/right airflow direction.
(d) [CONFIGURATION] button
To set the airflow direction of each fan on the indoor unit individually, select this button.
"Individual Airflow-Configuration" window opens.
"Individual Airflow - Configuration" window
Set the indoor unit air direction individually.
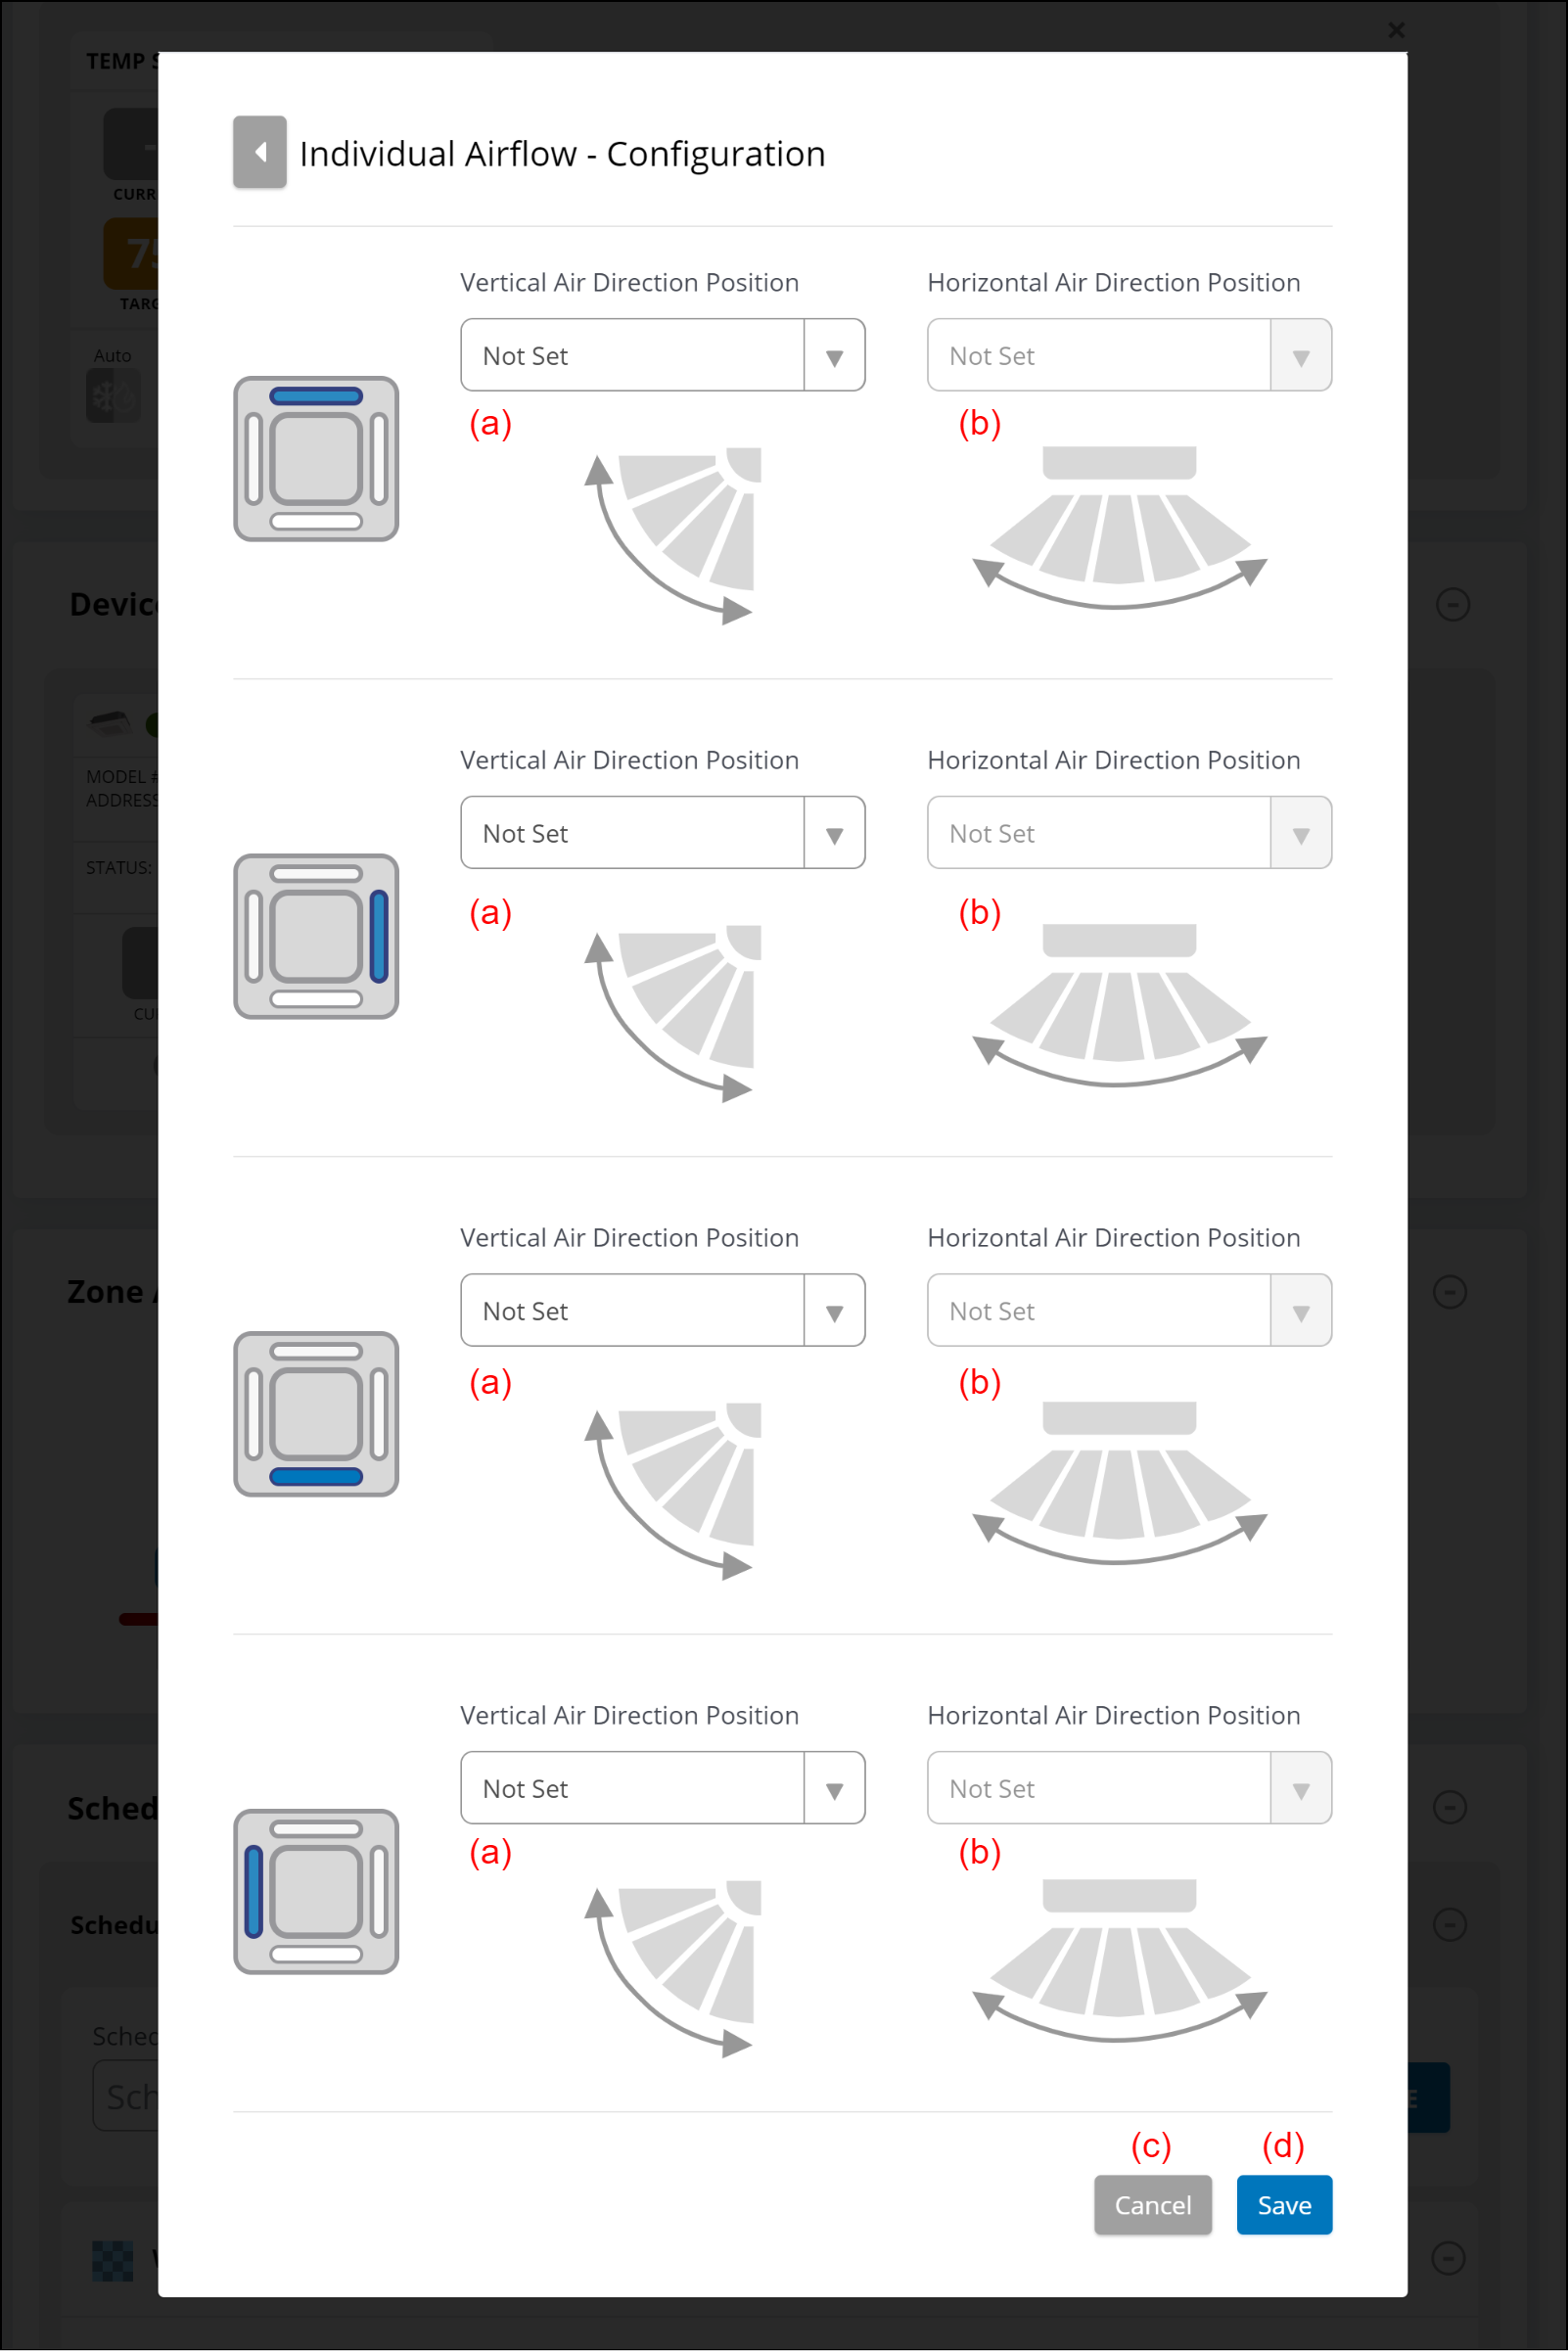
(a) Select the vertical louver position setting.
(b) Select the horizontal louver position setting.
(c) [Cancel] button
(d) [Save] button
Saves the Individual Airflow settings.
Occupancy Sensor Settings
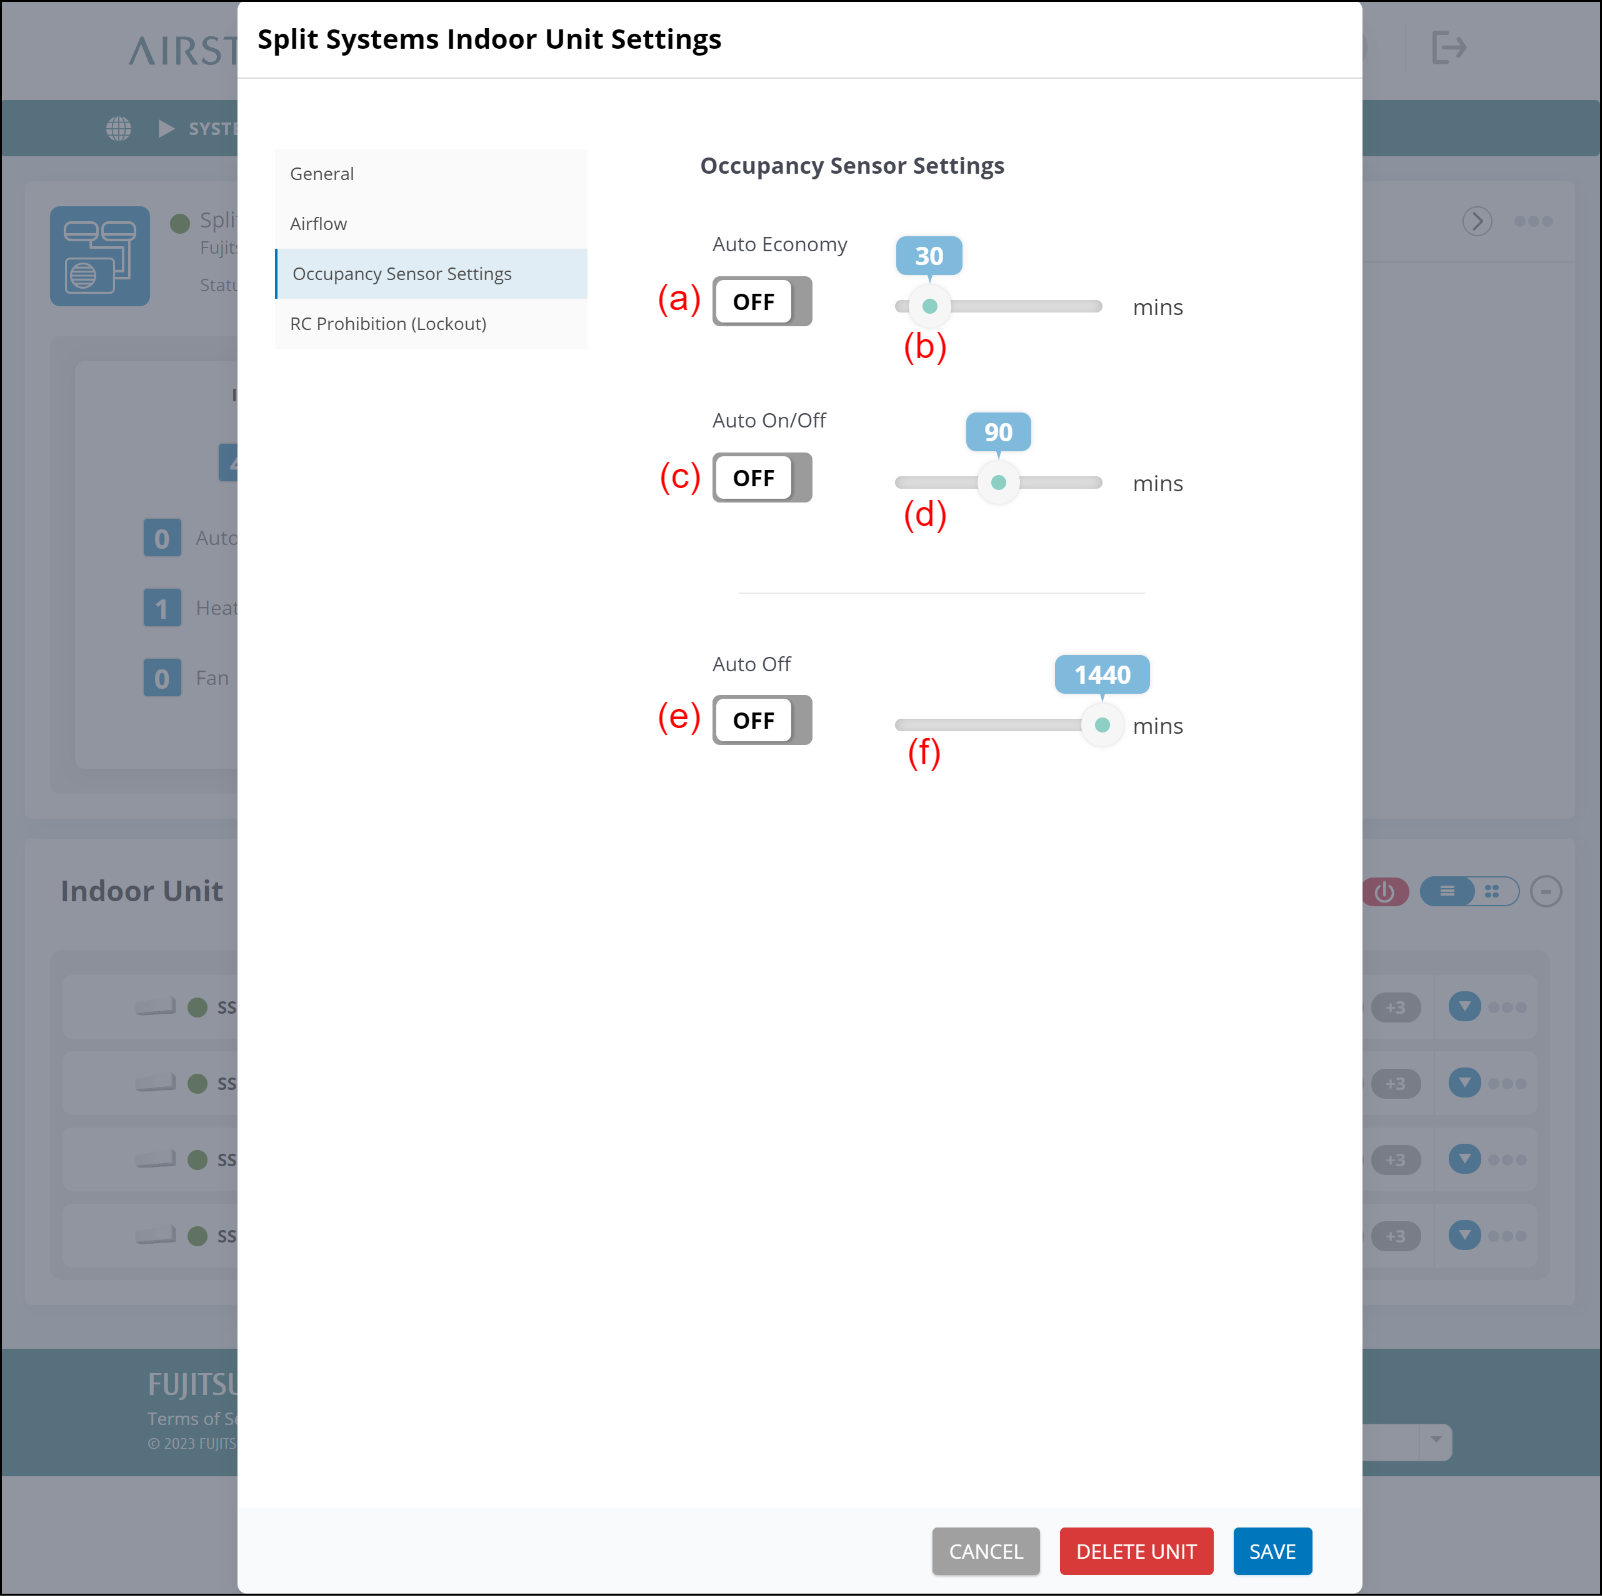
(a) [Auto Economy] button
To activate/deactivate the Auto Economy operation, select this button.
The Auto Economy operation moderates the air conditioner output if the room keeps vacant for the set time.
(b) Set the time to start the Auto Economy operation after the room becomes vacant.
(c) [Auto On/Off] button (supported in the future)
To activate/deactivate the Auto On/Off operation, select this button.
The Auto On/Off operation stops the air conditioner operation if the room keeps vacant for the set time. When people return to the room, the air conditioner operation restarts.
(d) Set the time to stop the air conditioner operation after the room becomes vacant. (supported in the future)
(e) [Auto Off] button
To activate/deactivate the Auto Off operation, select this button.
The Auto Off operation stops the air conditioner operation if the room keeps vacant for the set time.
(f) Set the time to stop the air conditioner operation after the room becomes vacant.
RC Prohibition (Lockout)
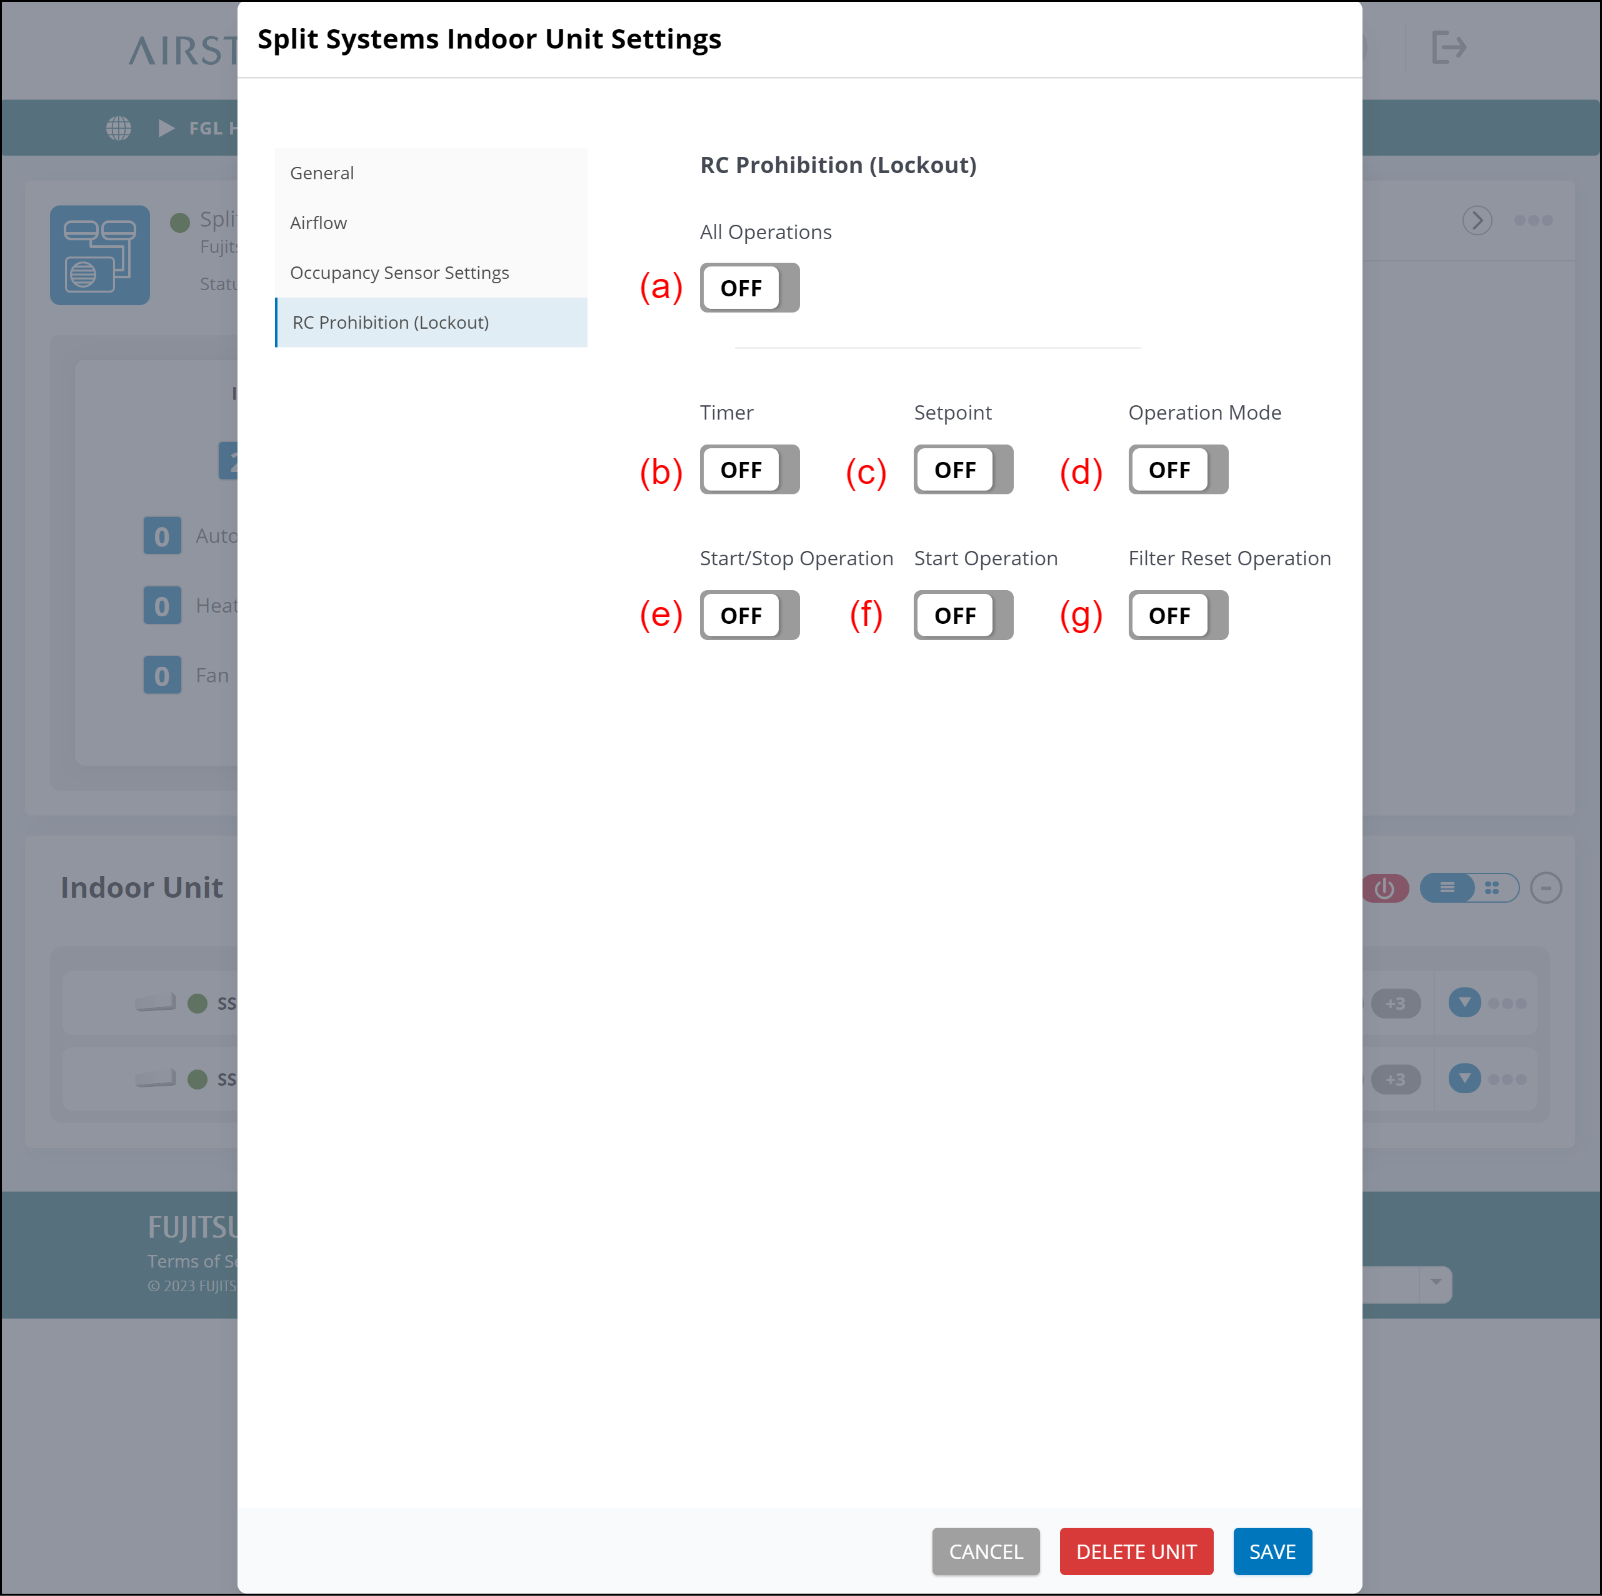
(a) [All Operations] button
This button forbids changing all operation settings.
(b) [Timer] button
This button forbids changing the timer settings.
(c) [Setpoint] button
This button forbids changing the temperature settings.
(d) [Operation Mode] button
This button forbids changing the operation modes.
(e) [Start/Stop Operation] button
This button forbids switching the operation status (on/off).
(f) [Start Operation] button
This button forbids starting the air conditioner operation.
(g) [Filter Reset Operation] button
This button forbids resetting the filter status.