Perform the setting change or removal for Zone (B)
Zone setting screen (B)
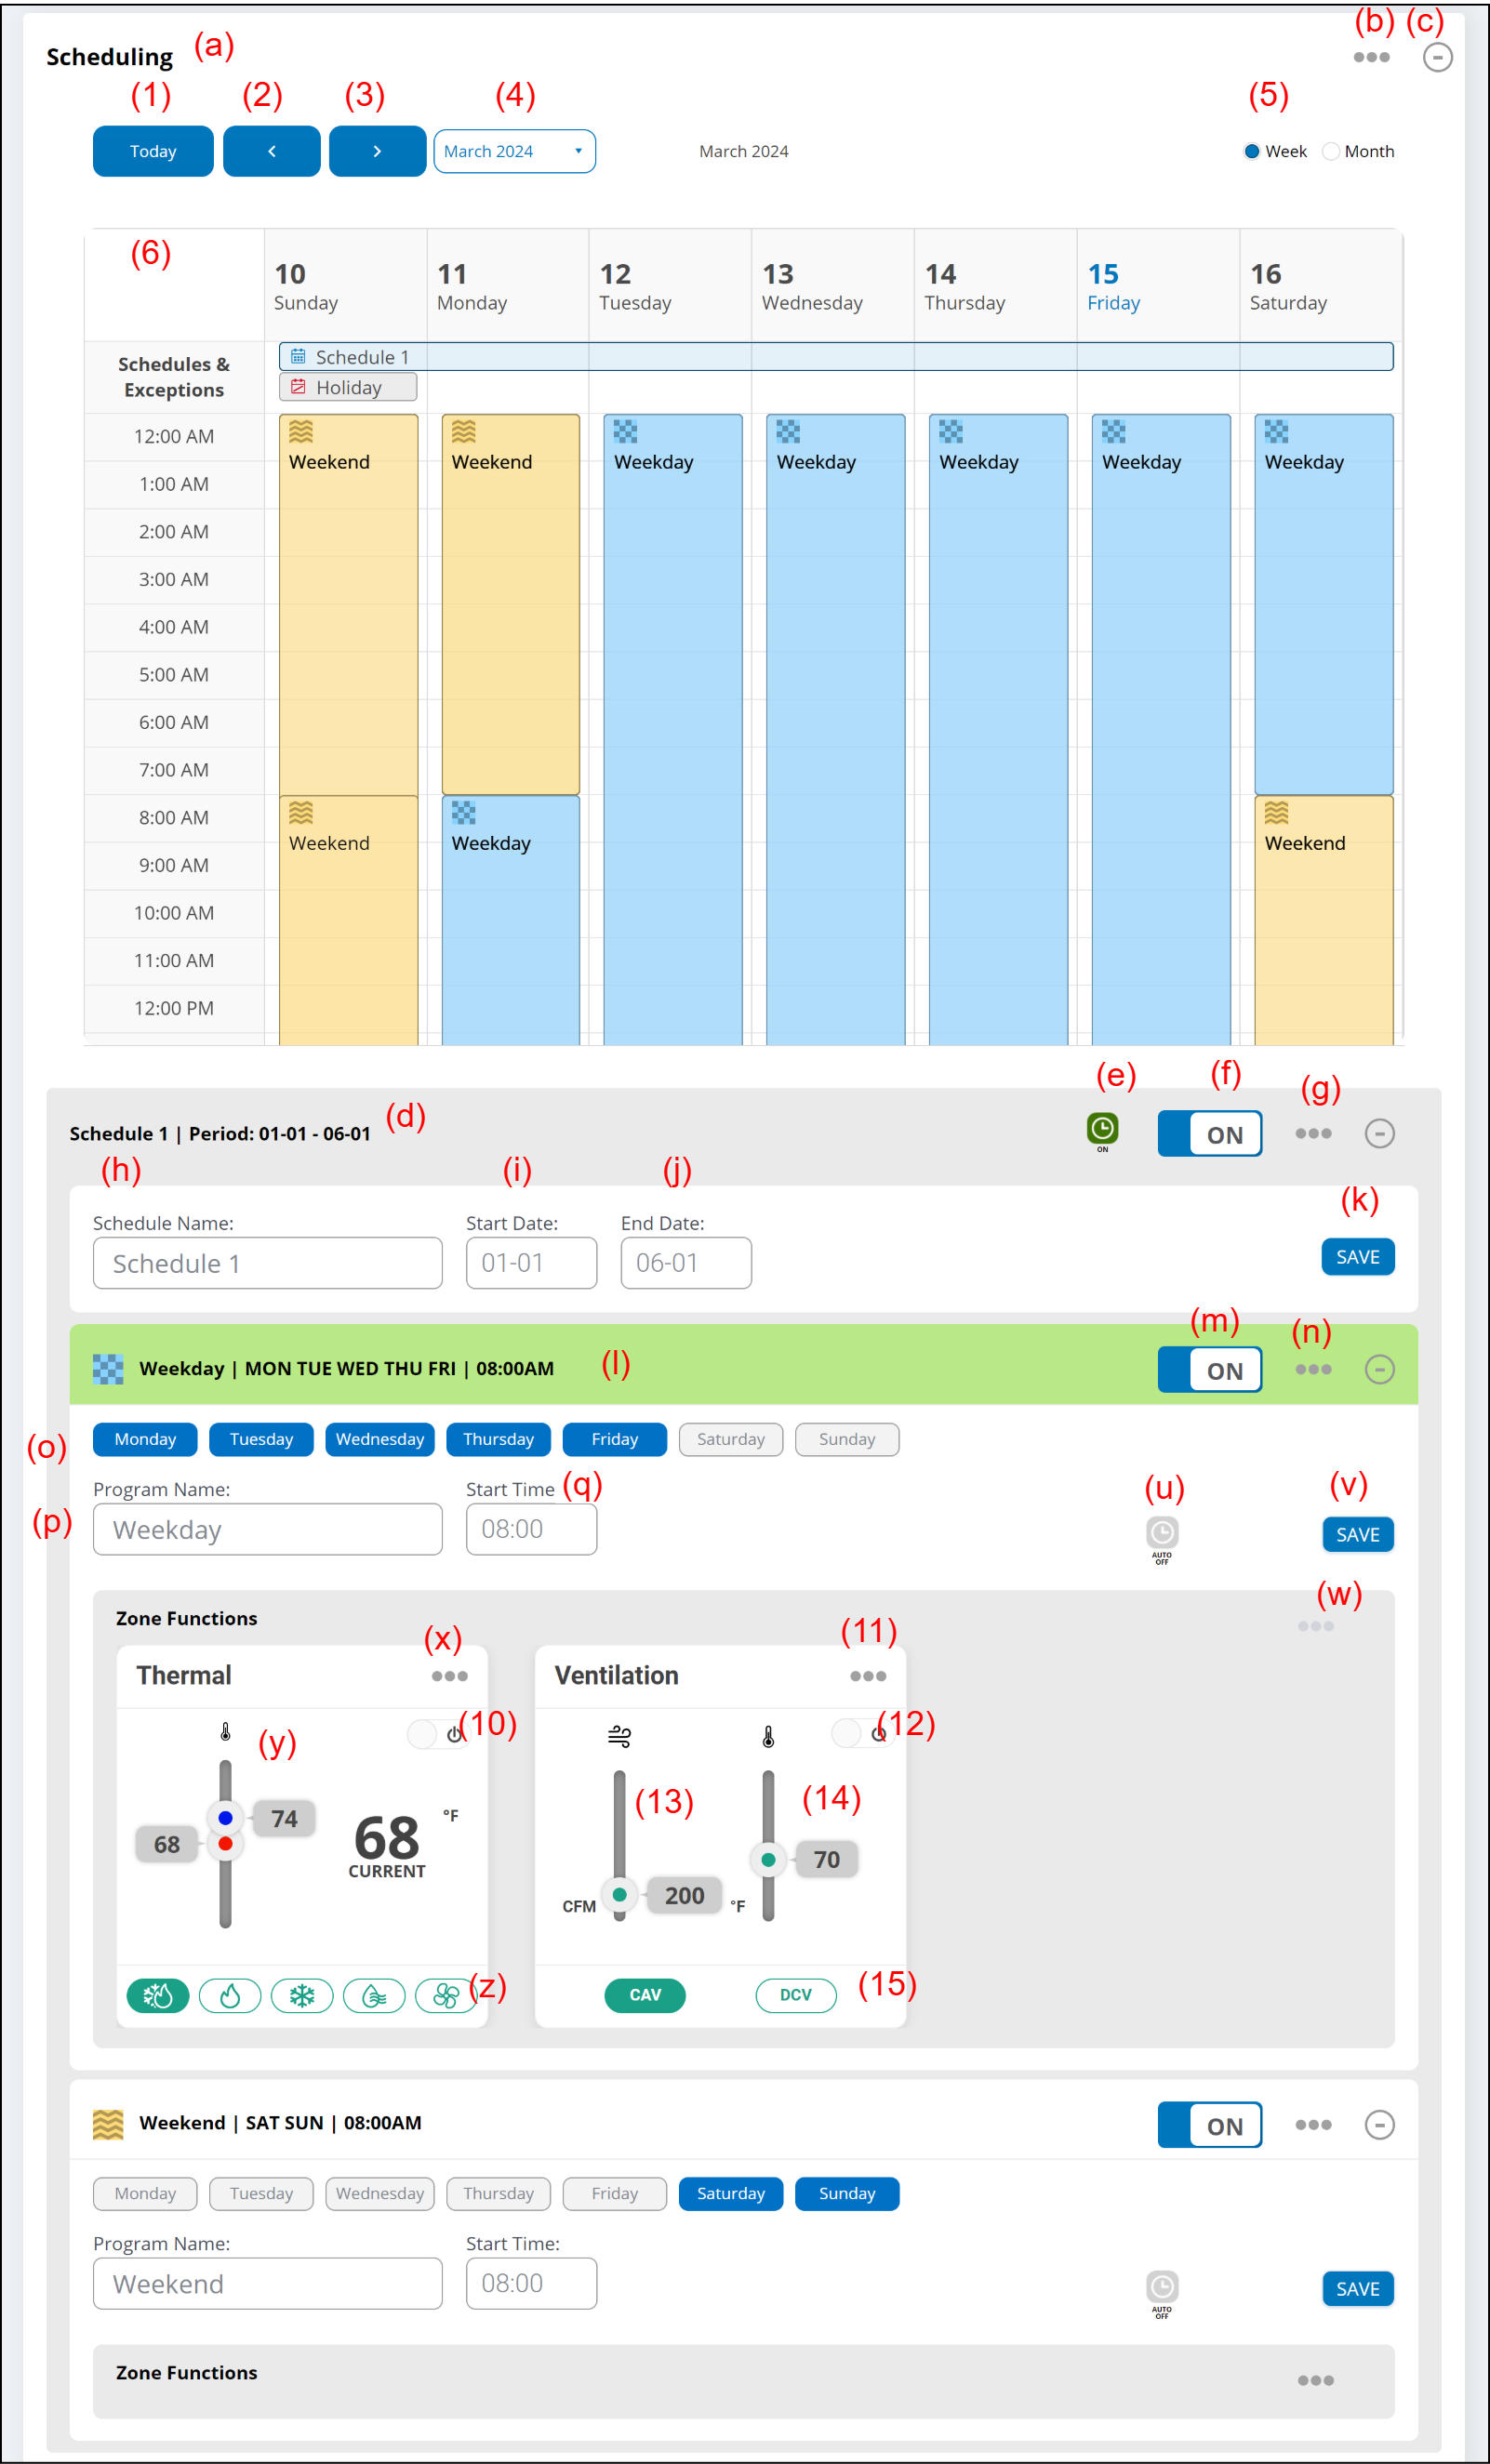
(a) Schedule setting
Day of the week and period can be specified at Schedule setting.
Operate (b) to (z) by this function.
| Item | Max. number of registration | |
|---|---|---|
| Schedule | 4 | (per 1 zone) |
| Program | 12 | (per 1 schedule) |
(b) Link button
- Add Schedule
Adds schedule.
(c) [-+] button
Expands or collapses the display.
(1) [Today] button
Displays week or month containing today's date.
(2) [<] button
Displays previous week or month.
(3) [>] button
Displays next week or month.
(4) Week / Month selection button
Selects any week or month.
(5) [Week / Month] button
Selects weekly display or monthly display.
(6) Schedule visualizer
Displays the setting schedule visually.
- For Week
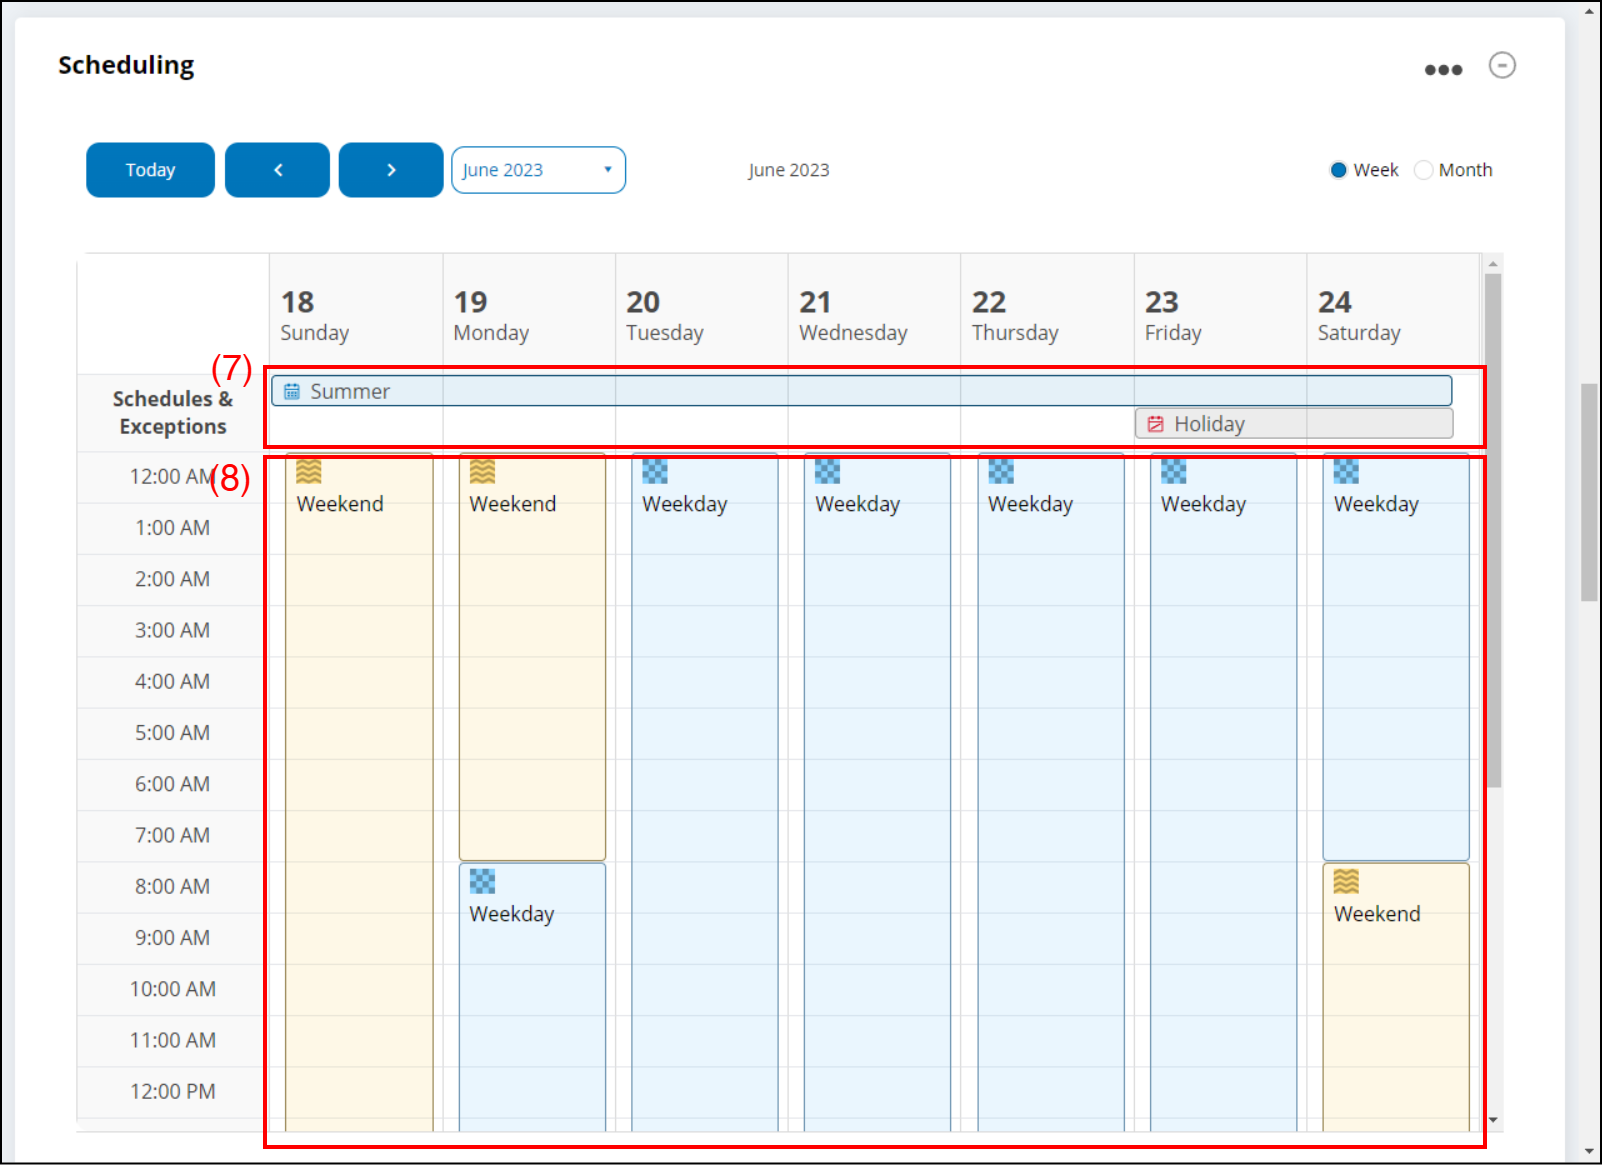
(7) When schedule or exception is set, it is displayed at the top of the screen.
(8) The set program is displayed until the start time of the next program setting.
In the above example, on a weekday, there is a program at 8:00 every morning, from Monday to Friday. Since there is another program at 8:00 on Saturday and Sunday, the weekday program is displayed until 8:00 on Saturday. - For Month
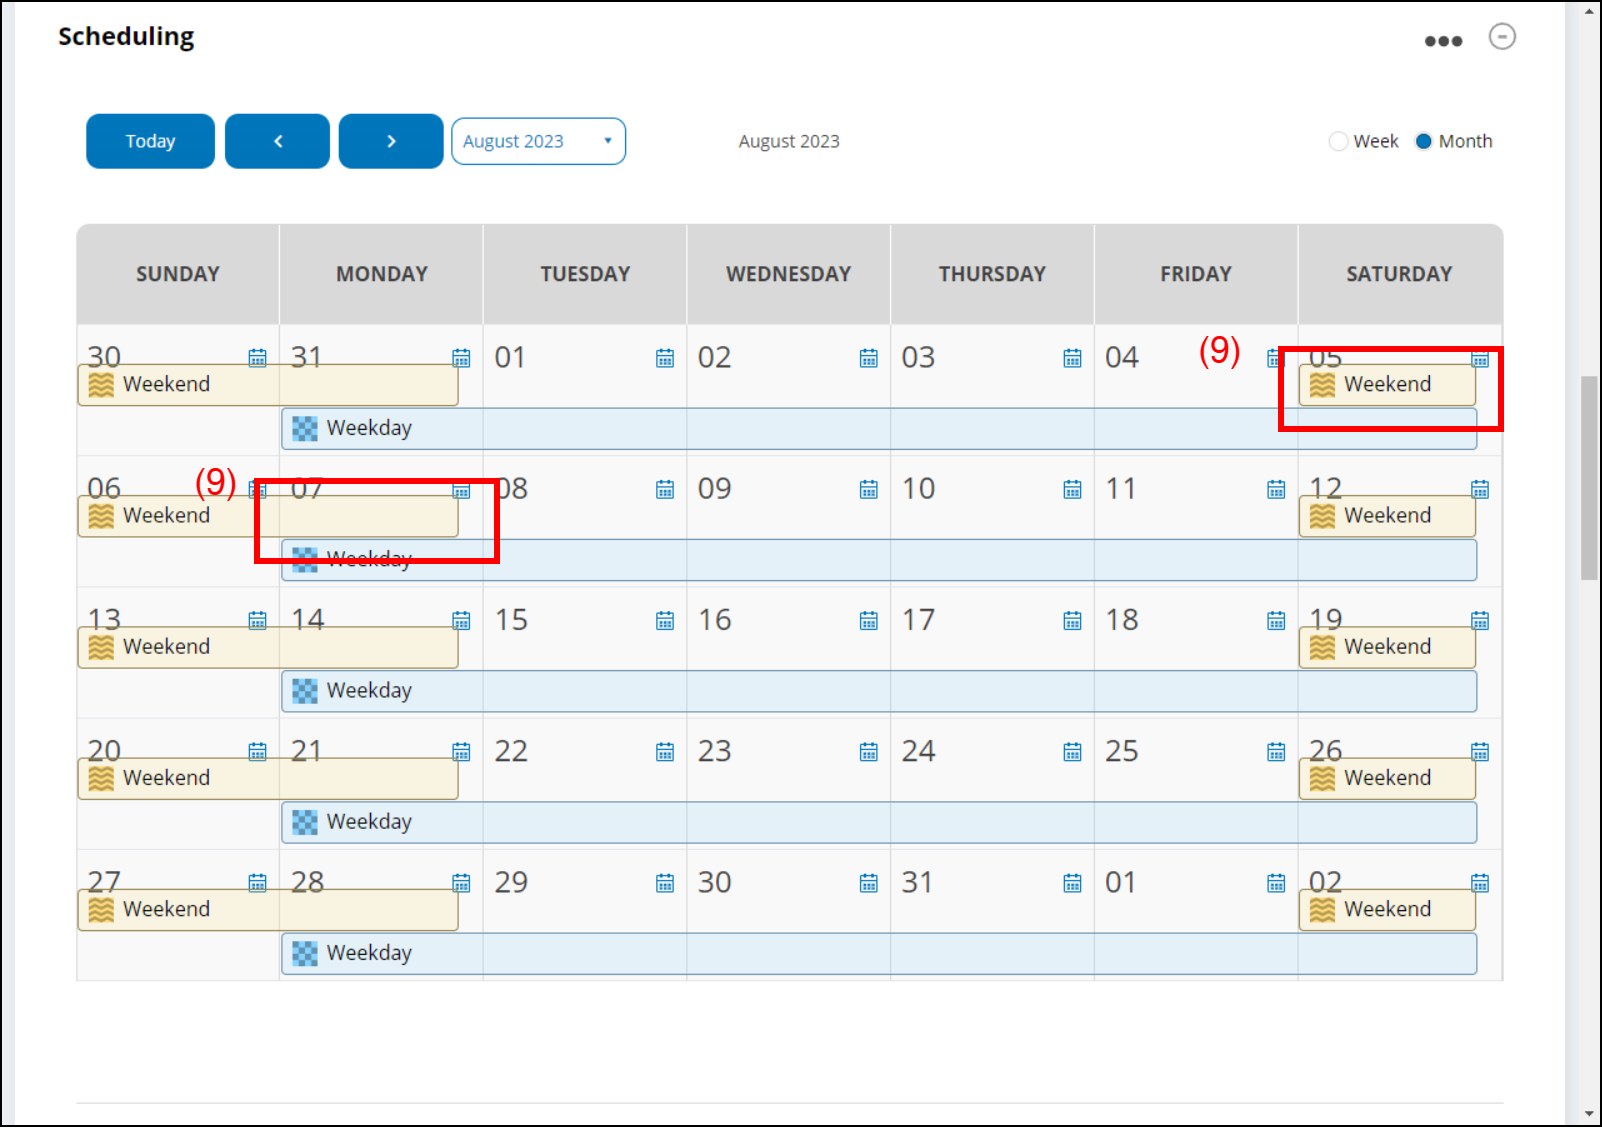
When schedule or exception is set, it is displayed on the setting date.
(9) The program in the schedule is displayed until the end date, so it is displayed overlapping with the next program start date.
(d) Displays the setting schedule name and period.
(e) Schedule Timer icon
When the Schedule execution period comes, the icon turns green.
(f) Schedule [On/Off]
Sets On/Off for the setting Schedule.
(g) Link button
- Delete Schedule
Select this to delete existing Schedule.
Add Program
Select this to add new Program.
(h) Enter the schedule name.
(i) Enter the start date of the schedule.
(j) Enter the end date of the schedule.
(k) [SAVE] button
Saves the schedule.
(l) The setting Program name and period are displayed.
(m) Program [On/Off]
Sets On/Off for the setting Program.
(n) Link button
- Delete Program
Select this to delete existing Program.
(o) Select the day of the week.
(p) Enter the program name.
(q) Enter the start time of the program.
The indoor units start/stop at the time.
For details, refer to "Example of Schedule".
(u) Auto Off [On/Off] icon
On/Off of Auto Off and time can be set.
(v) [SAVE] button
Saves the schedule.
(w) Link button
- Add Function
Select this to add new Zone Function.
(x) Link button
- Remove
Select this to delete existing Zone Function.
(y) Set the temperature setpoint.
(z) Set the operation mode.
(10) Set the thermal On/Off
Sets On/Off for the device that can set temperature registered in the Zone.
(11) Link button
- Remove
Select this to delete existing Zone Function.
(12) Set the Ventilation On/Off
Sets On/Off for the device that can set ventilation registered in the Zone.
(13) Ventilation Target Temperature
Sets the target temperature of fresh air supplied to the Zone by Ventilator.
(14) Target airflow volume
Sets the target airflow volume.
(15) Ventilator Operation Mode
Sets the operation mode.
"Add Schedule" window
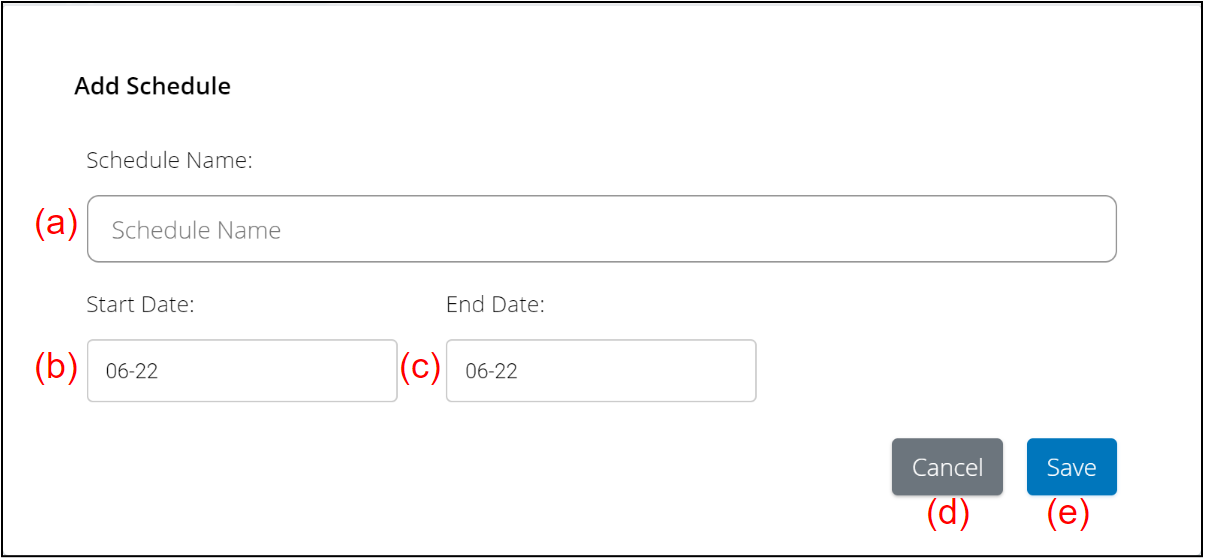
(a) Enter the schedule name.
(b) Enter the start date.
(c) Enter the end date.
(d) [Cancel] button
(e) [Save] button
Saves the Schedule.
"Add Zone Functions" window
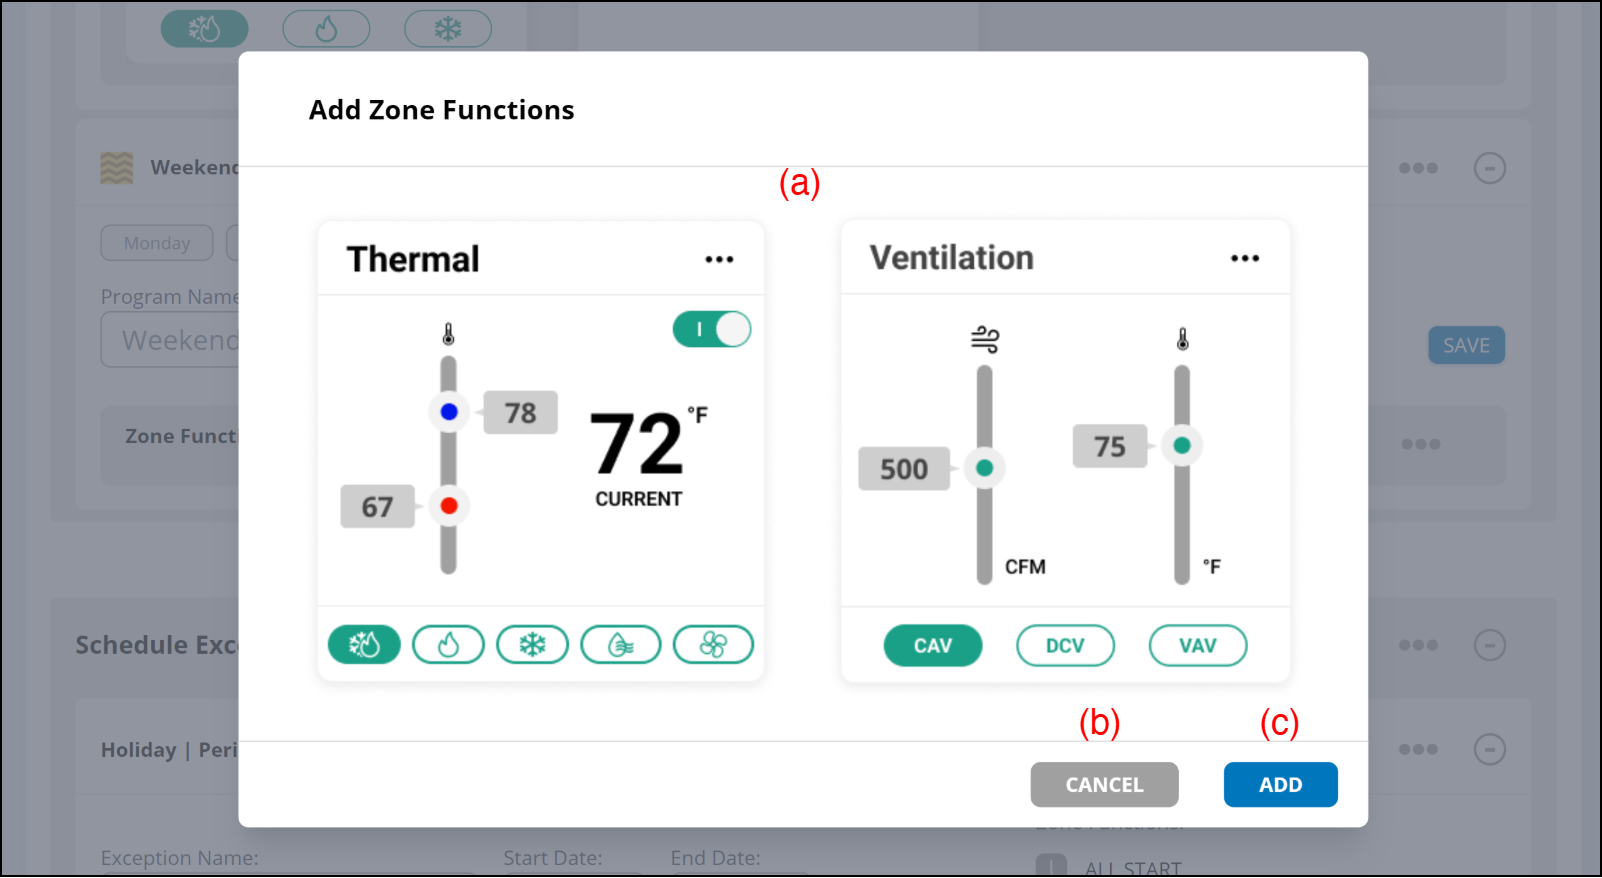
(a) Select the Zone function to be added.
(b) [CANCEL] button
(c) [ADD] button
Adds the Zone functions.