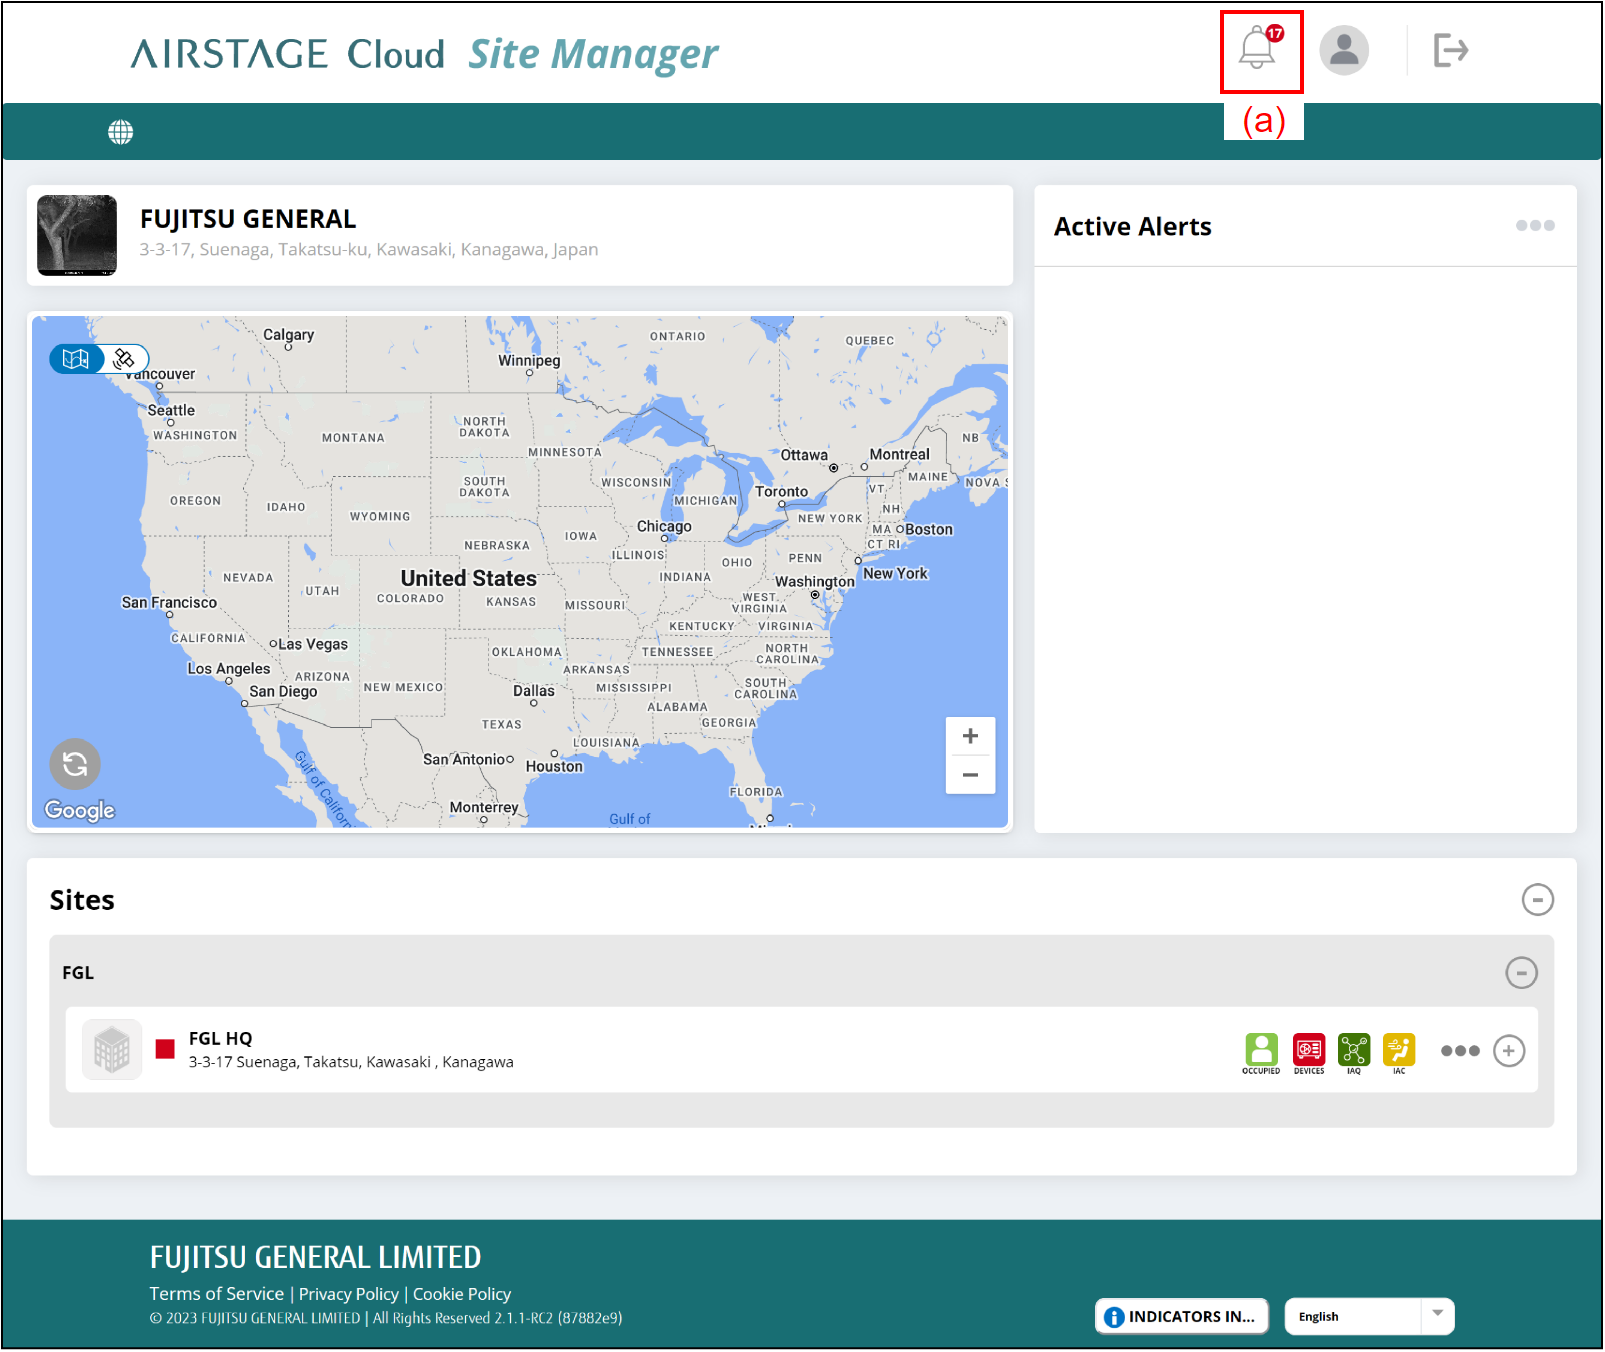
Add Site (for Initial Setup)
- Select the button (a).
The screen will move to the "Settings" screen.
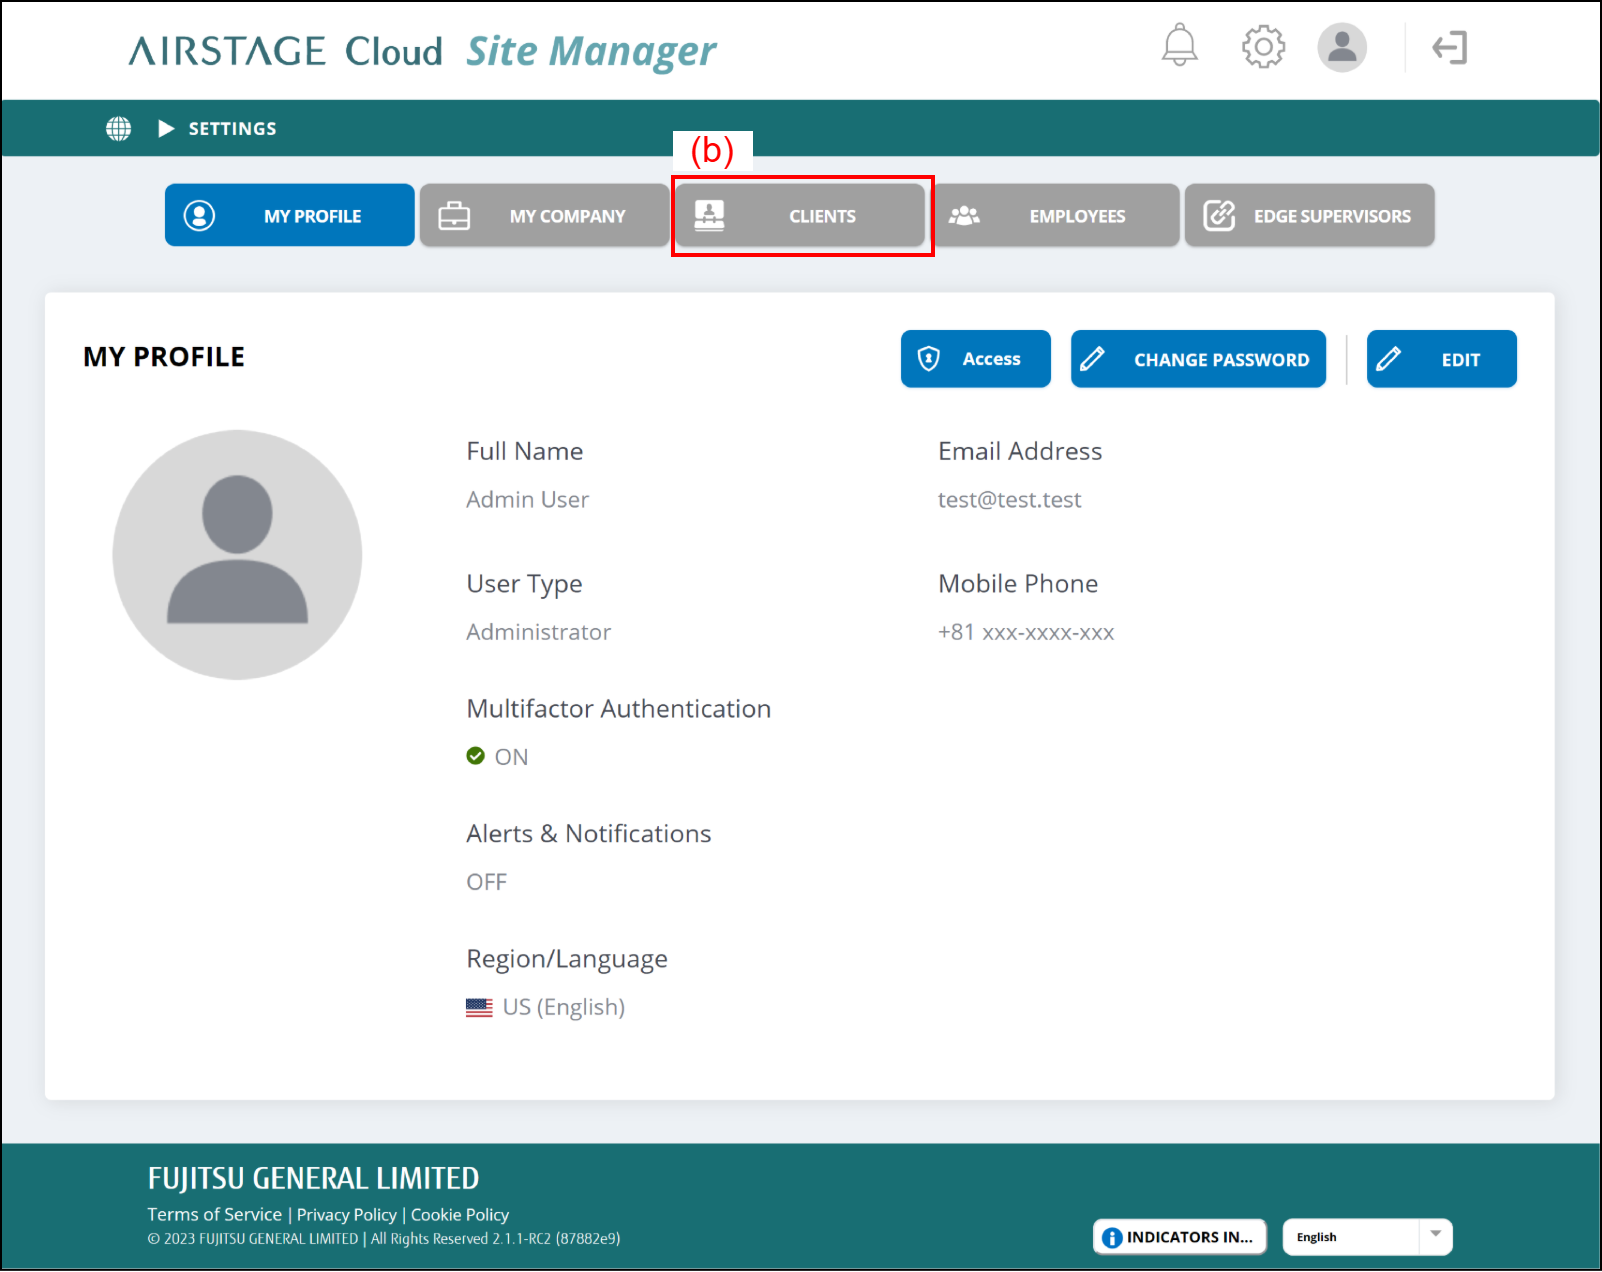
- Select the tab (b).
The display will switch to "Clients" screen.
* Clients mean companies that possess Sites. For details on Site, refer to "AIRSTAGE Cloud Site Manager control structure".
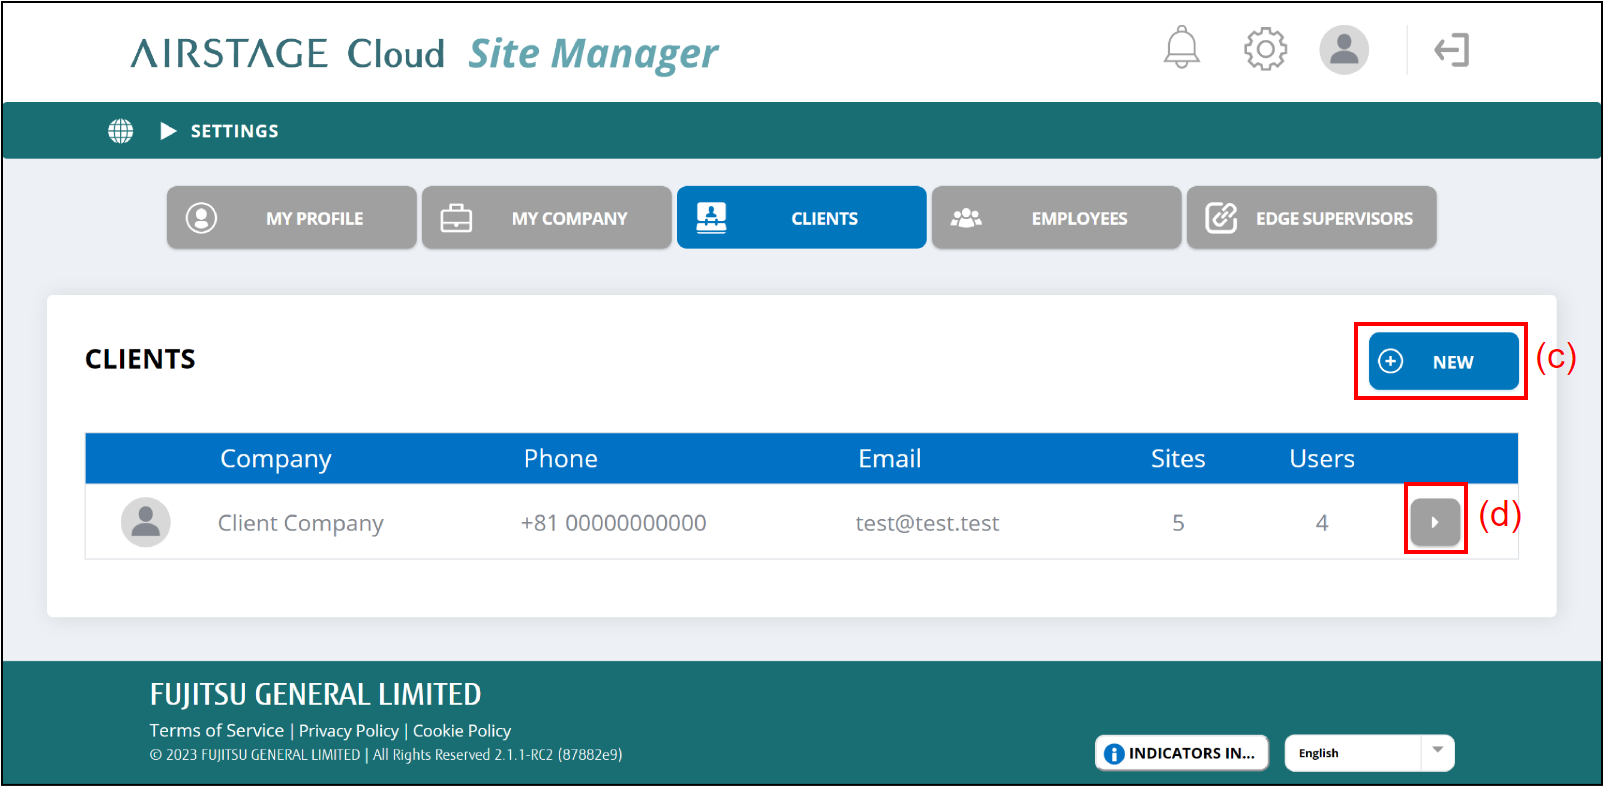
- Select the button (d) of the client to which you will create the Site.
If the client is not registered, select the button (c) to add the client. Refer to "Add client" for details.
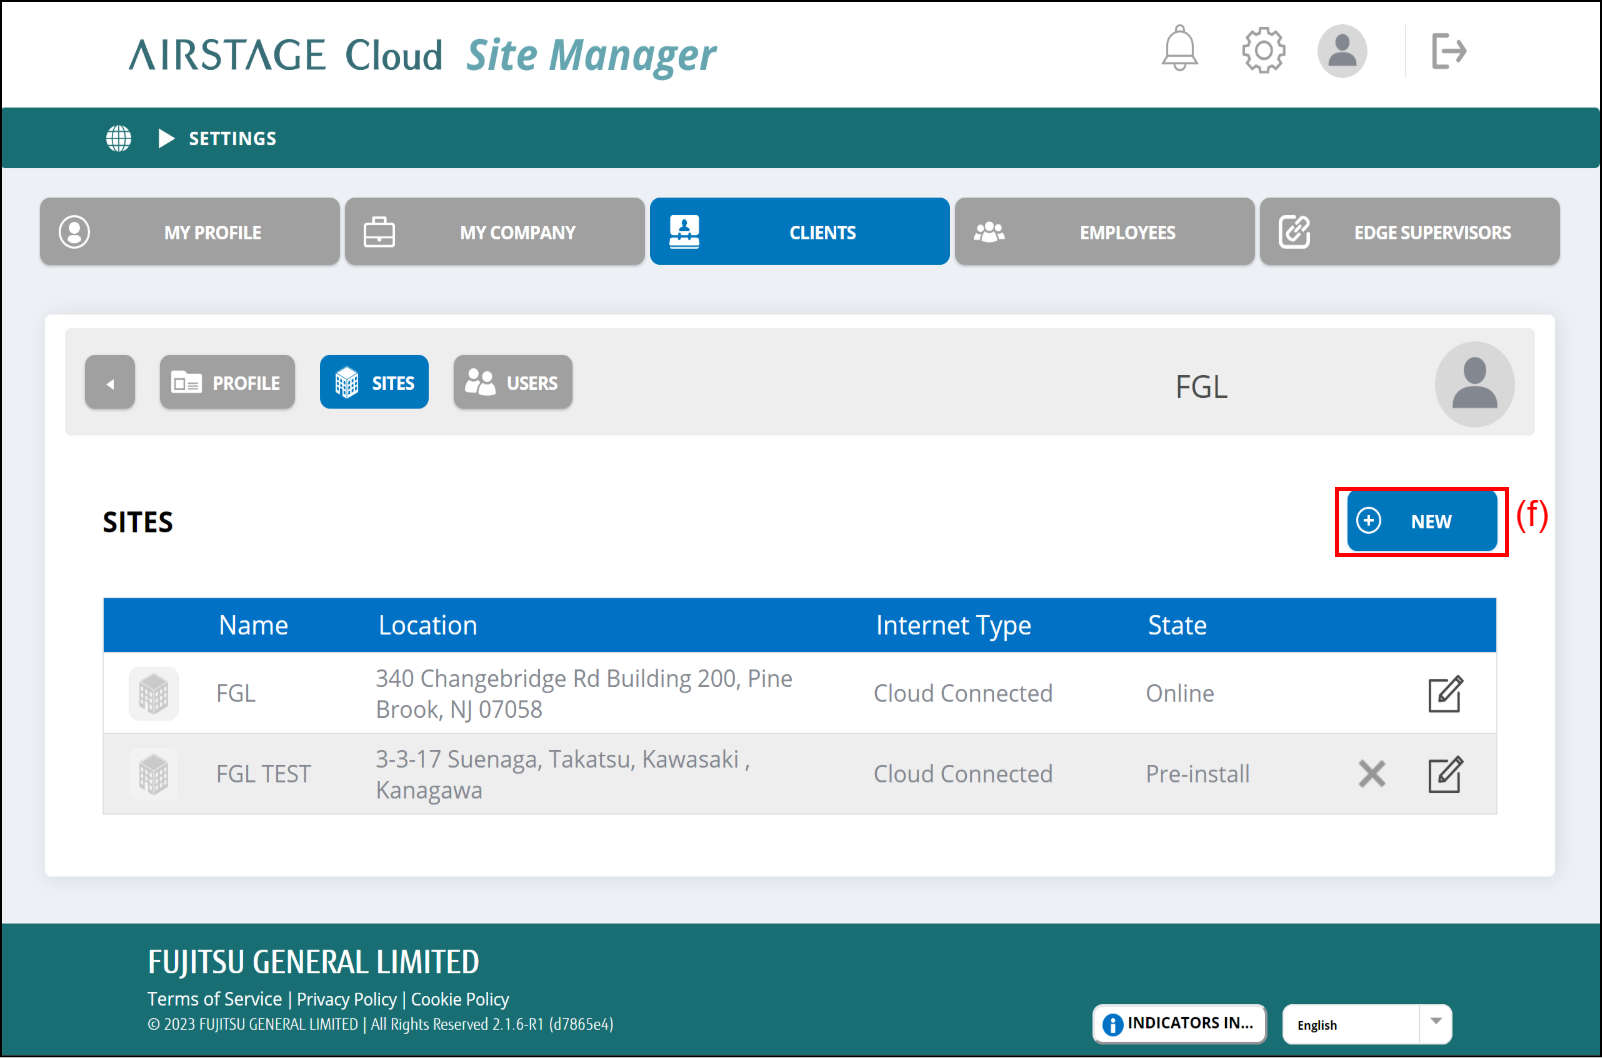
- Select the tab (e).
The information on the Sites belonging to the client will be shown.
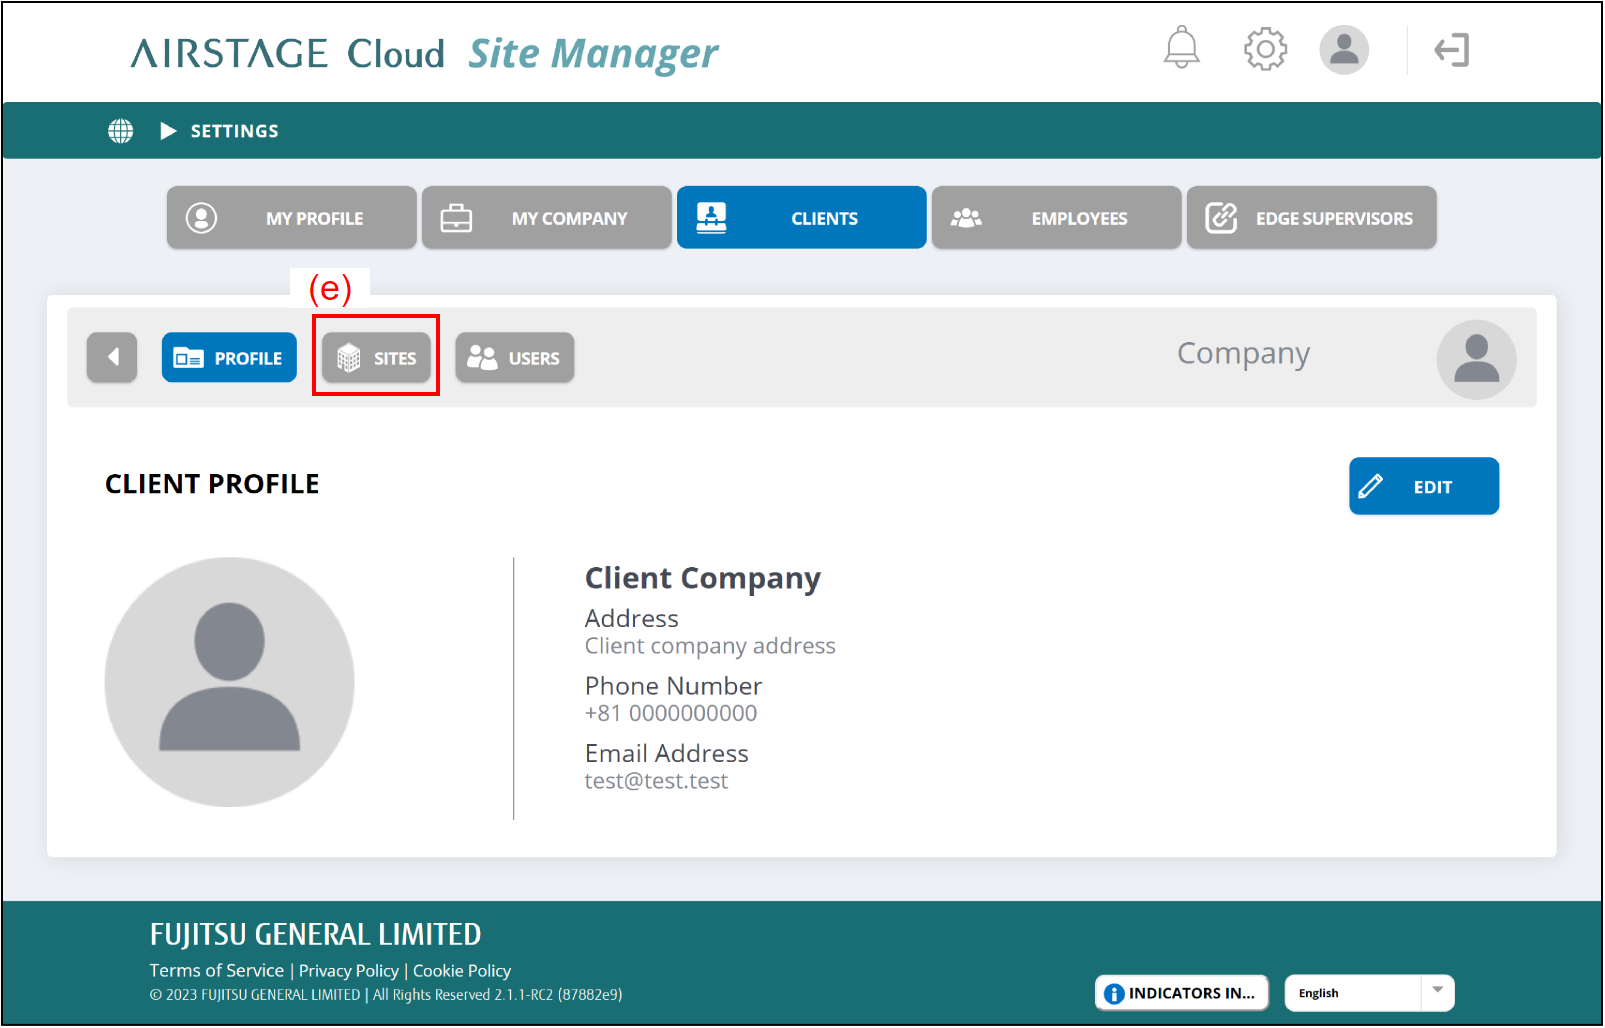
- Select the button (f).
The screen will move to the "Add Site" screen.
- Enter the information on the new Site.
- After filling the setting items, select the button (o).
Site creating is complete and the screen will move to the Site Dashboard of the new Site.
If you cancel the creating Site, select the button (n).
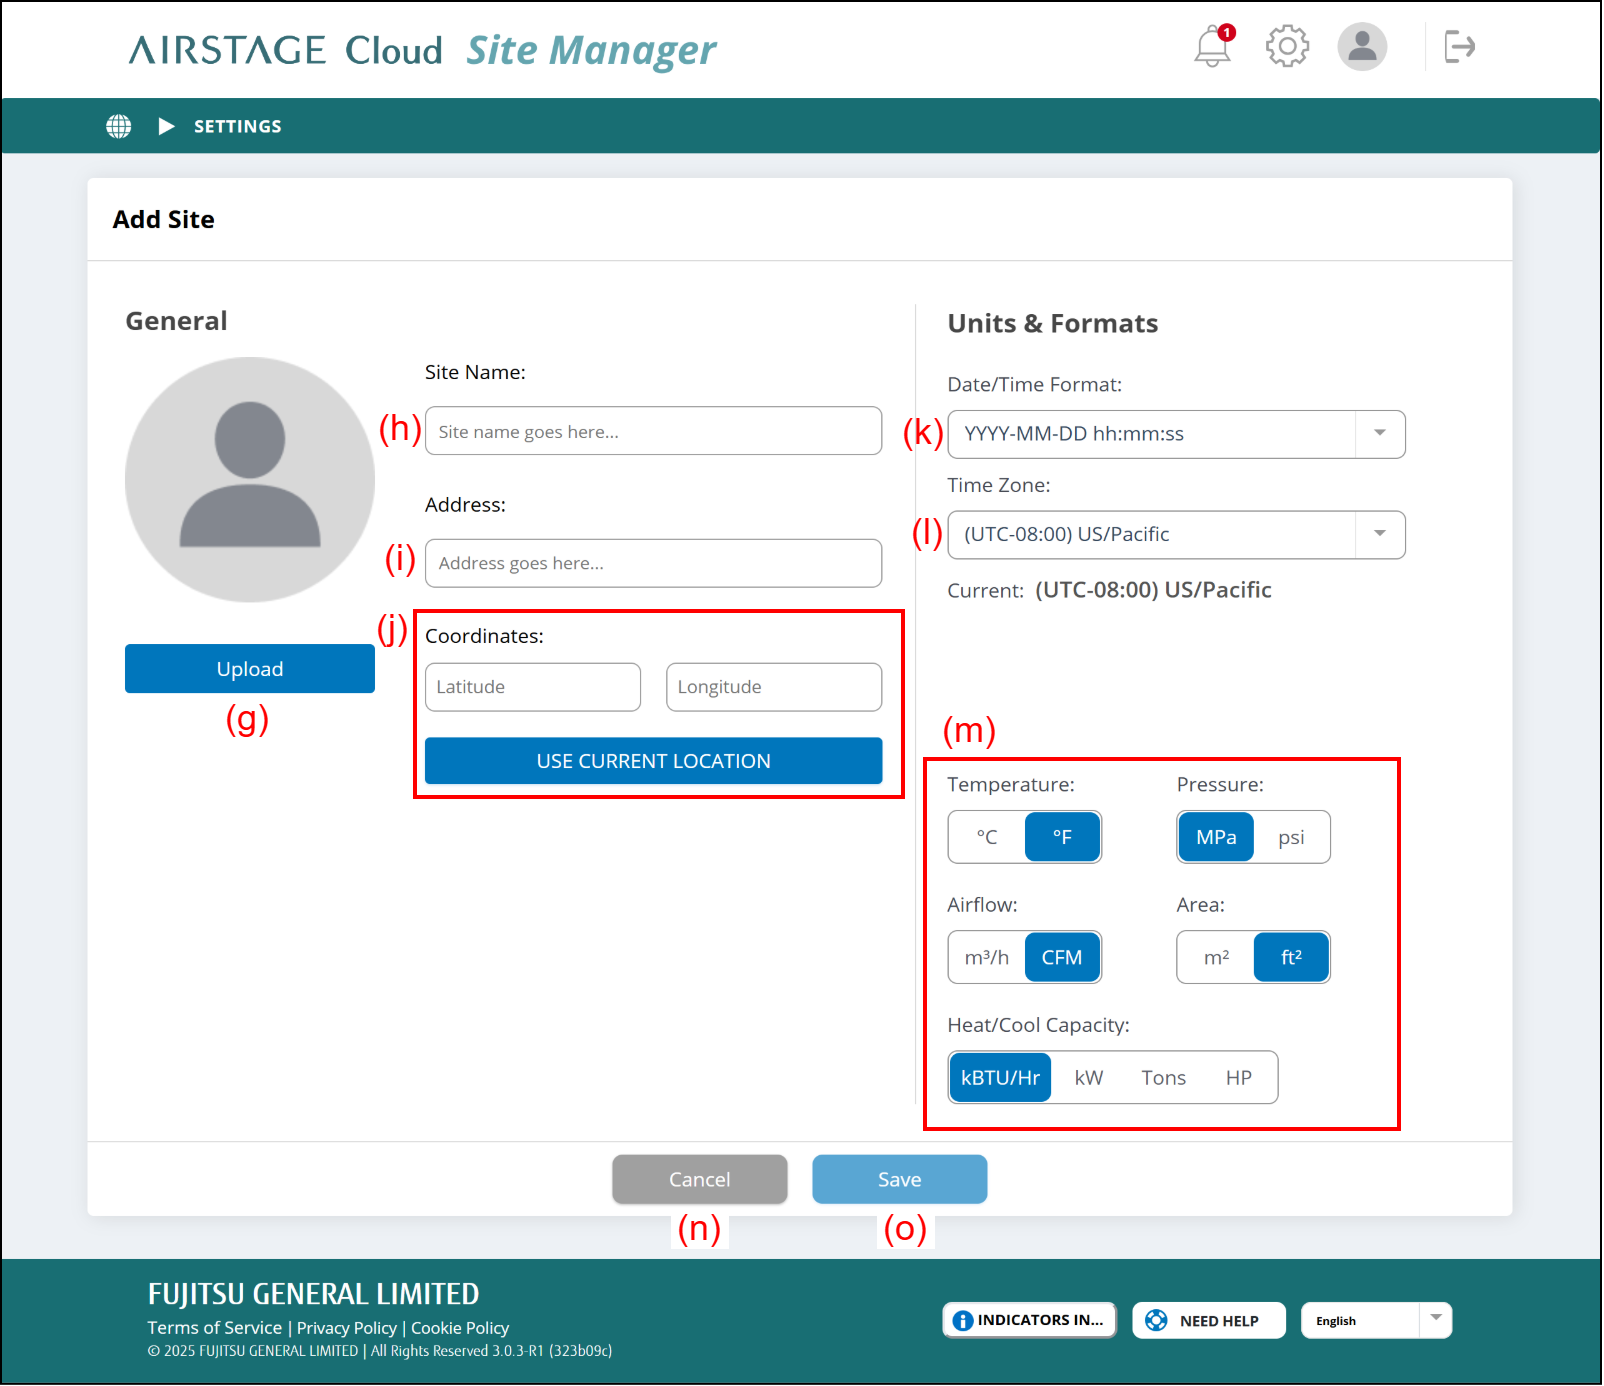
(g) [Upload] button
Select and register a photo of the Site saved in the connected devices.
→ Select and register your favorite photo of the site or person saved in the connected devices. You can also register your photos later.
(h) Site Name
Enter the Site name. It must be 20 characters or less.
(i) Address
Enter the Site address.
(j) Set the coordinates of the Site by either of the following methods.
- Input the latitude and longitude.
- Select [Current Location] button to acquire the present location information.
After setting the coordinates, the location of the Site is shown on the map of the "Portfolio Dashboard" screen.
(k) Date/Time Format
Select the date and time format from the pull-down menu.
(l) Time Zone
Select the time zone of the Site from the pull-down menu.
(m) Units settings
Select the units used in this Site.
Next, assign the AIRSTAGE Cloud Edge Supervisor to the Site. Refer to "Assign the AIRSTAGE Cloud Edge Supervisor to Site".