INSTALLATION OF BLE ADAPTER INSIDE OUTDOOR UNIT *Only for PAC, Multi-split, and ATW
When BLE adapter is connected to the outdoor unit in RECORDING MODE (Recording mode) (→ Mode switching), the operating data from immediately before the error occurred to the time the error occurred is recorded in BLE adapter.
The recorded operating data (Error history) can be checked by switching to MONITORING MODE (Monitoring mode). For details, refer to RECORDS (Error history list).
When BLE adapter is installed inside the outdoor unit, use a thick and double-sided tape with strong adhesion. (Recommended: 3M Y-4914)
 |
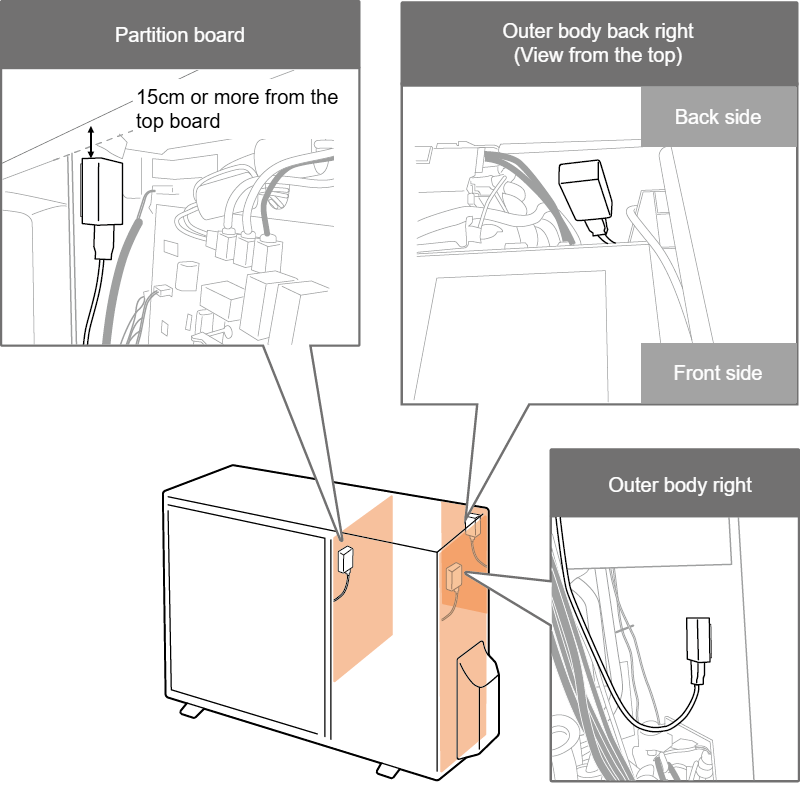
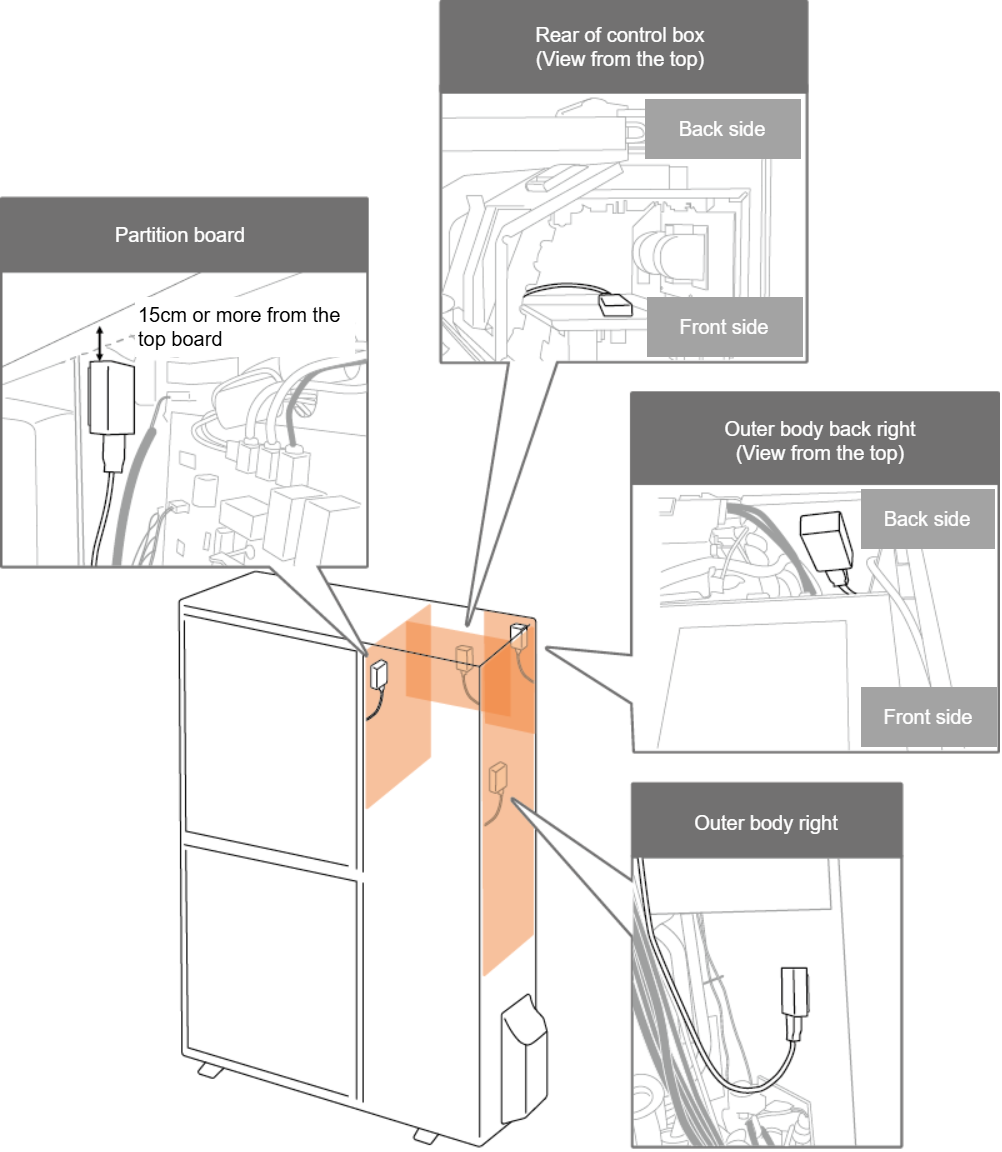
・Do not bundle the power supply lead, the compressor lead, the fan motor lead and the harness of Service Monitor Tool together. ・Do not get it in contact with the surrounding piping. ・The USB terminal side of BLE adapter should be facing down so that the condensation water inside the outdoor unit does not enter the BLE adapter. (In addition, if vinyl tape or similar material is wrapped around the USB terminal of the BLE adapter, it will be more effective.) ・When BLE adapter is installed, remove dust or oil before installing. ・When installing BLE adapter, do not touch metal parts such as sheet metal. ・When BLE adapter is installed on the partition board, place it at least 15 cm away from the top board. ・When BLE adapter is installed on the partition board, do not install it near the slit hole. ・Do not allow the cable for control PCB (TYPE 1/2/3) to come into contact with metal parts such as sheet metal. |
[Example of installation position]
* If the installation position differs from the example, install it according to on-site conditions.
| For 1-fan | For 2-fan |
|
|
|